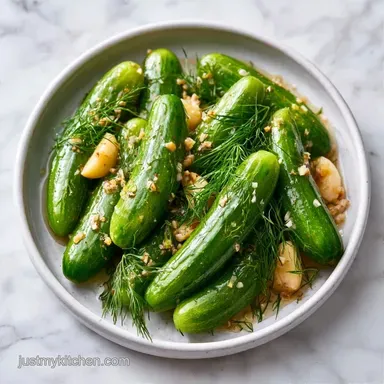
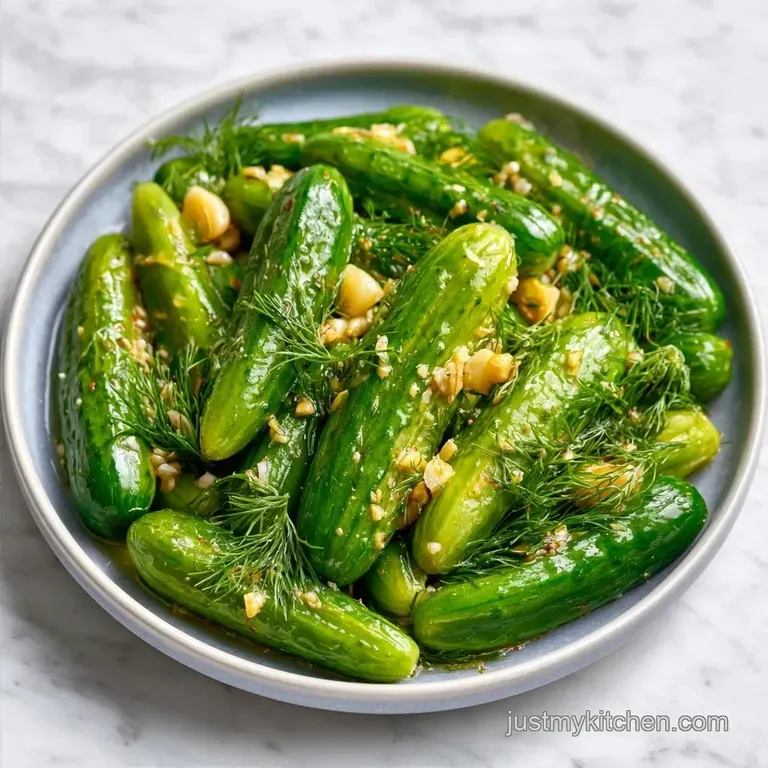
Crunchy Grandmas Canned Dill Pickles
- Time: 30 min active + 20 min cook
- Flavor/Texture Hook: Sharp, garlic heavy, and seriously crunchy
- Perfect for: Beginners who want a reliable pantry staple
There is nothing like the sound of a fresh pickle snapping between your teeth. That specific crack is what makes a homemade batch worth the effort. I used to buy the store-bought jars, but they always felt a bit limp and overly sweet, even the "sour" ones.
The real star here is the Kirby cucumber. If you use a standard slicing cucumber from the grocery store, you'll end up with a soggy mess. Kirbys have a thicker skin and a denser interior that stands up to the brine without collapsing.
This recipe for Canned Dill Pickles focuses on getting that deli style punch without needing a professional kitchen. We're keeping the tool list short and the steps simple, so you can spend more time eating and less time scrubbing pots.
How to Make Canned Dill Pickles
The goal is a balance of salt and acid. If you go too heavy on the vinegar, it tastes like cleaning fluid. Too little, and the pickles won't stay preserved. We're using a 5% acidity white distilled vinegar because it's clean and doesn't change the color of the cukes.
The Vinegar Balance: A 5% acidity level ensures the brine is acidic enough to stop spoilage. Trimming the Ends: Cutting the blossom end removes enzymes that cause softening.
| Method | Time | Texture | Best For |
|---|---|---|---|
| Stovetop Canned | 65 mins | Firm & Zesty | Long term storage |
| Quick Fridge | 24 hours | Very Crisp | Eating within 3 weeks |
The Basic Recipe Specs
Before we get into the jars, let's look at what we're dealing. This process is efficient. You'll spend about 30 minutes prepping the vegetables and aromatics, and another 20 minutes handling the brine and packing.
The total time is 1 hour 5 mins. This doesn't include the time it takes for the jars to cool or for the flavors to meld. Trust me, waiting a few days before opening the first jar makes a huge difference in the taste.
The Best Picking Ingredients
The salt choice is non negotiable here. Use pickling salt. Table salt has anti caking agents that turn your brine cloudy, and kosher salt can vary too much in grain size, which messes with your measurements.
What the Ingredients Do
| Ingredient | What It Does | Best Swap |
|---|---|---|
| White Vinegar | Provides acidity | Apple Cider Vinegar (adds sweetness) |
| Pickling Salt | Draws out moisture | Pure Sea Salt (fine grain) |
| Kirby Cukes | Maintains crunch | Persian Cucumbers (smaller size) |
| Fresh Dill | Adds herbal punch | Dill Seed (more concentrated) |
The Full List
- 6 lbs pickling cucumbers (Kirby variety) Why this? Denser flesh prevents sogginess
- 11 cups water
- 5 cups white distilled vinegar (5% acidity) Why this? Neutral flavor, reliable acidity
- 1 cup pickling salt Why this? No additives to cloud the brine
- 12 cloves garlic, smashed
- 12 sprigs fresh dill heads or stems
- 2 tbsp whole black peppercorns
- 2 tbsp mustard seeds
Minimal Tools You'll Need
You don't need a fancy canning setup to get this done. A large stainless steel pot is a must. Avoid aluminum or copper pots because the vinegar reacts with the metal and can give your Canned Dill Pickles a metallic tang.
Grab six quart sized canning jars with lids and rings. You'll also want a sharp knife for trimming the blossom ends and a slotted spoon to help pack the cucumbers tightly.
The step-by-step Process

- Wash the cucumbers thoroughly in cold water. Slice off the blossom end (the first 1/16th of an inch) of each cucumber. Note: This prevents the pickles from getting soft.
- Cut the cucumbers into spears or rounds.
- Combine the water, white vinegar, and pickling salt in a large stainless steel pot.
- Bring the brine to a rolling boil. Reduce heat and simmer for 10 minutes until the salt is fully dissolved and the liquid is clear.
- Place two smashed garlic cloves, one sprig of dill, 1 tsp of peppercorns, and 1 tsp of mustard seeds into the bottom of each sterilized quart jar.
- Pack the cucumber spears tightly into the jars. Leave exactly 1/2 inch of headspace at the top.
- Pour the hot brine over the cucumbers, maintaining that 1/2 inch gap.
- Wipe the rims clean and seal the lids tightly.
Tips and Common Pitfalls
I once forgot to trim the blossom ends on a whole batch. Within a week, they were mush. It's a tiny step, but it's the difference between a snap and a squish.
Troubleshooting Common Issues
| Issue | Solution |
|---|---|
| Why Your Pickles Softened | This usually happens because of those blossom end enzymes or using the wrong cucumber variety. If you use a slicing cucumber, the water content is too high. |
| Why the Brine Is Cloudy | Cloudy brine often comes from using table salt with additives or not simmering the brine long enough. If you use pure pickling salt, it should stay clear. |
| Why the Seal Failed | Usually, this is due to a dirty jar rim or not leaving enough headspace. A tiny bit of food debris on the rim prevents the lid from gripping. |
Flavor Variations to Try
If you want a shelf stable version, you can tweak the processing time in a water bath. But for those who like a bit of a kick, I suggest adding a sliced habanero or a teaspoon of red pepper flakes to each jar.
For a "Deli Style" blend, add a strip of lemon peel and a few mustard seeds to the brine. It adds a brightness that cuts through the garlic. If you love garlic, double the amount of cloves. Since we're using smashed cloves, the flavor penetrates the cucumbers more effectively.
Storage and Zero Waste
Store your Canned Dill Pickles in a cool, dark place like a pantry. Once you pop the seal, they move to the fridge and stay good for about 2 months.
Don't throw away the brine. It's basically a seasoned salt vinegar solution. I use a splash of it to marinate chicken or to brighten up a potato salad. If you have leftover cucumber ends, toss them into a quick pickling jar with a bit of sugar and vinegar for a 24 hour snack.
For those using the water bath method, make sure the jars are fully submerged by an inch of water to ensure consistent heating.
What to Serve This With
These pickles are a natural fit for a savory charcuterie board. Pair them with a sharp cheddar, some salty salami, and grainy mustard. The acidity of the Canned Dill Pickles cleanses the palate between the rich meats and cheeses.
They are also a requirement for a classic deli sandwich. Pile some smoked turkey, swiss cheese, and sprouts on rye bread, then add two thick spears on the side. The crunch provides a great contrast to the soft bread.
Quick Decision Guide
- If you want a sharper bite: Use 100% vinegar and reduce the water.
- If you want more garlic: Slice the cloves thinly instead of smashing them.
- If you want them sweeter: Add 1/4 cup of sugar to the brine.
A Note on Myths
You might hear that you need to "cure" cucumbers in salt for hours before canning. While that works for fermented pickles, it's not necessary for vinegar based Canned Dill Pickles. The salt in the brine does the job while they sit.
Another myth is that you can use any cucumber. You can't. Slicing cucumbers have thinner skins and more water, which means they'll lose their structure almost immediately once the heat hits them. Stick to Kirbys.
Recipe FAQs
Do homemade dill pickles in vinegar need to be refrigerated?
No, not until the seal is broken. Canned jars stored in a cool, dark pantry are shelf stable. Once opened, keep them refrigerated for up to 2 months.
How to make simple dill pickles?
Combine 11 cups water, 5 cups white vinegar, and 1 cup pickling salt in a stainless steel pot. Boil the brine, simmer for 20 minutes, and pour over cucumbers packed with dill and garlic in sterilized jars.
How to make homemade dill pickle juice?
Boil 11 cups water, 5 cups white vinegar, and 1 cup pickling salt. Simmer the mixture for 10 minutes to ensure the salt is fully dissolved before using it as a brine.
Is it true that any cucumber will work for these pickles?
No, this is a common misconception. Use Kirby cucumbers specifically, as other varieties often lack the firmness required to maintain a proper snap.
How do I prevent my homemade pickles from turning out soft?
Trim the blossom ends of every cucumber. Slicing off the first 1/16th of an inch is essential to remove enzymes that cause the vegetables to become mushy.
How to make pickle relish from these dill pickles?
Pulse the finished pickles in a food processor or chop them finely by hand. These savory pickles make a great tangy addition to a chickpea tuna salad.
Can you use store-bought pickle juice to make more pickles?
No, this is not recommended. store-bought juices are often depleted of the precise salt and acidity levels needed to safely preserve a new batch of cucumbers.
Canned Dill Pickles Recipe 2