Shelf Stable Garlic Dill Pickles: Extra Crunchy
- Time: 30 min active + 24 hours cooling
- Flavor/Texture Hook: Tangy, salty crunch with a garlic punch
- Perfect for: Pantry stocking and beginner canners
- Everything About Making Dill Pickles
- The One Thing That Changes Everything
- What Each Ingredient Does
- The Essential Gear
- Simple Step-by-Step Instructions
- Fixing Common Pickle Problems
- Flavor Twists and Swaps
- Adjusting the Batch Size
- Truths About Pickling
- Storage and Pantry Guide
- Best Foods to Pair
- Very High in Sodium
- Recipe FAQs
- 📝 Recipe Card
Everything About Making Dill Pickles
That distinct, sharp snap when you bite into a cold pickle is the only thing that matters here. I used to buy the store-bought jars, but they always felt a bit soft and lacked that raw garlic bite. Once you try them home-made, you can't go back.
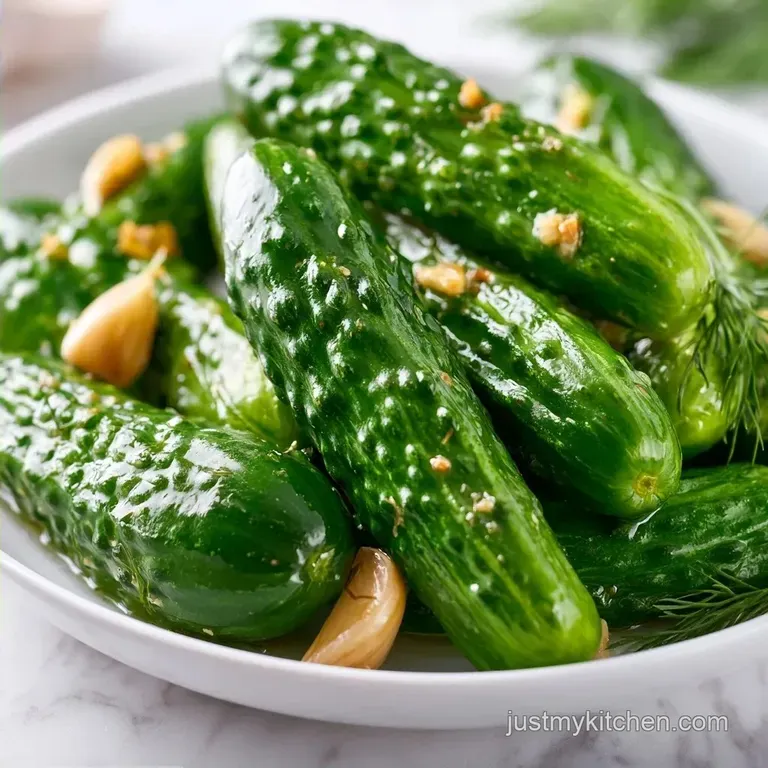
The hero here is the pickling cucumber. Don't reach for those long English cucumbers from the salad aisle, as they have too much water and will turn mushy in the brine. You need the small, bumpy Kirbys. They have a thicker skin and a denser core, which is why they hold up so well during the canning process.
These Dill Pickles are designed to be shelf stable, meaning you can tuck them away in the pantry and forget about them until you need a snack. It's a straightforward process that doesn't require a culinary degree, just a bit of patience while the jars cool.
The One Thing That Changes Everything
Blossom End Removal: Slicing off the tip of the cucumber removes enzymes that cause softening. If you leave them on, your pickles will likely lose their crunch.
Pickling Salt: Using non iodized salt prevents the brine from turning cloudy. Pure salt keeps the liquid clear and the flavor clean.
Cold Packing: Putting fresh, cold cucumbers into the jars before adding boiling brine helps maintain the internal structure.
| Method | Time | Texture | Best For |
|---|---|---|---|
| Quick Fridge | 24 hours | Very Crisp | Immediate eating |
| Water Bath | 25 hours | Classic Crunch | Long term storage |
| Fermented | 2 weeks | Tangy/Soft | Probiotic health |
What Each Ingredient Does
| Ingredient | What It Does | Best Swap |
|---|---|---|
| Pickling Salt | Draws out moisture, preserves | Kosher salt (non iodized) |
| Distilled Vinegar | Provides acidity for safety | Apple cider vinegar (milder) |
| Fresh Garlic | Adds pungent, savory depth | Garlic powder (not recommended) |
| Fresh Dill | Gives the signature herbal flavor | Dried dill weed (use less) |
The Essential Gear
You don't need a professional kitchen to do this. A large stainless steel pot for the water bath is the main requirement. If you have a wide mouth funnel, it makes filling the jars much cleaner, but a steady hand works too.
I suggest using a bubble remover or even a clean plastic knife to get the air out of the jars. Trapped air can interfere with the seal, and nothing is worse than finding a leaked jar in your pantry three months later.
Make sure your jars are sterilized. You can run them through a hot dishwasher cycle or boil them for a few minutes. This ensures your stable dill pickles stay safe to eat without needing refrigeration.
Simple step-by-step Instructions
Preparing the Cucumbers
- Wash the cucumbers thoroughly in cold water. Slice off approximately 1/16th of an inch from the blossom end of each cucumber to remove softening enzymes. Note: This prevents the "mush" factor.
Infusing the Brine
- In a stainless steel saucepan, combine the distilled vinegar, filtered water, pickling salt, mustard seeds, peppercorns, red pepper flakes, and sugar.
- Bring the brine mixture to a rolling boil over medium high heat, stirring occasionally until the salt and sugar have completely dissolved.
Packing the Jars
- Place two smashed garlic cloves and one sprig of fresh dill at the bottom of each sterilized pint jar.
- Pack the cucumbers tightly into the jars, leaving 1/2 inch of headspace. Note: Pack them firm so they don't float too much.
Filling and Sealing
- Pour the boiling brine over the cucumbers, maintaining the 1/2 inch headspace.
- Remove any trapped air bubbles using a bubble remover, wipe the jar rims clean, and seal with lids and bands.
Processing for Shelf Stability
- Process the jars in a water bath canner for 15 minutes. Listen for the "ping" of the lids sealing as they cool.
- Remove jars and allow them to cool undisturbed for 24 hours before moving to a pantry.
Fixing Common Pickle Problems

It's easy to get frustrated when a batch doesn't look like the picture. Most of the time, it's a simple fix involving temperature or salt. If you're looking for a fresh alternative while these cure, a creamy cucumber salad is a great way to use leftover cucumbers.
Why Your Pickles Softened
This usually happens because the blossom end wasn't trimmed or the brine wasn't acidic enough. According to Serious Eats, maintaining the correct acid to water ratio is what keeps the cell walls of the vegetable intact.
Why the Brine Is Cloudy
Cloudiness usually comes from using table salt with iodine or anti caking agents. It doesn't necessarily mean the food is unsafe, but it looks less appealing.
Handling Seal Failure
If a lid doesn't pop or feels loose after 24 hours, the seal failed. Just put that specific jar in the fridge and eat it first.
| Problem | Root Cause | Solution |
|---|---|---|
| Mushy texture | Blossom end left on | Trim 1/16th inch off the tip |
| Cloudy liquid | Iodized salt used | Use pure pickling salt |
| Lid didn't seal | Air bubble trapped | Use a bubble remover tool |
Flavor Twists and Swaps
If you want to change the vibe of your Dill Pickles, start with the spices. I love adding a few slices of fresh jalapeño to each jar for a subtle heat that hits the back of your throat. It doesn't overpower the dill, but it adds a nice layer of complexity.
For those who prefer a slightly sweeter profile, you can increase the sugar to 2 tablespoons. It won't turn them into bread and butter pickles, but it rounds out the sharpness of the white vinegar.
If you're out of fresh dill, you can use dried dill weed. Just remember that dried herbs are more concentrated, so use about a third of the amount. For more inspiration on using fresh herbs, my homemade tzatziki is another great way to let dill shine.
Decision Shortcut:
- If you want more heat, add sliced habaneros.
- If you want a deeper flavor, add a pinch of turmeric.
- If you want them saltier, increase the pickling salt by 1 tablespoon.
Adjusting the Batch Size
Scaling this recipe is simple, but you have to be careful with the spices. If you're doubling the batch to make 12 jars, don't just double the red pepper flakes or the garlic.
Scaling Down (Half Batch): Use 2 lbs of cucumbers and halve all liquids. Use a smaller saucepan to prevent the brine from evaporating too quickly during the boil. Reduce the processing time in the water bath by about 2 minutes.
Scaling Up (Double Batch): When making a massive amount of stable dill pickles, increase the salt and vinegar exactly, but only increase the pepper flakes and mustard seeds by 1.5x. Overdoing the spices can make the brine taste bitter.
Work in batches when packing the jars to ensure the brine stays boiling hot when it hits the cucumbers.
| Original Ingredient | Substitute | Why It Works |
|---|---|---|
| White Vinegar | Apple Cider Vinegar | Similar acidity. Note: Gives a fruitier, amber color |
| Fresh Garlic | Garlic Powder | Convenient. Note: Lacks the pungent punch of fresh cloves |
| Filtered Water | Distilled Water | Removes minerals. Note: Helps prevent cloudiness |
Truths About Pickling
There are a few things people tell you about canning that just aren't true. I've heard that you need a vacuum sealer for the jars, but a standard water bath canner does the job just fine. The heat creates the vacuum naturally as the jar cools.
Another common myth is that you can use any cucumber from the garden. If you use a slicing cucumber, the skin is too thin and the interior is too watery. They will soften almost immediately, regardless of how much salt you use.
Some people think that adding more vinegar makes them last longer. While acidity is key for safety, too much vinegar will simply overpower the flavor and make the Dill Pickles taste like straight acid.
Storage and Pantry Guide
Once the jars have cooled for 24 hours and the lids have popped, move them to a cool, dark place. A basement or a low kitchen cabinet works best. Keep them away from the oven or dishwasher, as extreme temperature swings can break the seal.
These stable dill pickles will stay good for about a year in the pantry. Once you open a jar, however, the shelf stability ends. Put the open jar in the fridge, where they'll stay crisp for another 3-4 months.
To avoid waste, don't throw away the leftover brine. It's basically a seasoned salt vinegar solution. I use it as a marinade for grilled chicken or pour a splash into a potato salad to give it a zesty kick. You can even use it to quick pickle some red onions for tacos.
Best Foods to Pair
These pickles are the best when they provide a contrast. The acidity cuts right through fatty foods. I love serving them alongside a heavy roast or a plate of fried chicken.
For a snack board, pair them with sharp cheddar cheese and some salty salami. The vinegary snap cleanses the palate between the rich meats and cheeses. If you're making a deli style sandwich, pile on the smoked turkey, swiss cheese, and a few thick slices of these pickles.
You can also chop them up finely and mix them into a tartar sauce for fish. The garlic and dill notes blend perfectly with mayonnaise and lemon juice, creating a bright accompaniment for fried cod or shrimp.
Very High in Sodium
1208 mg 1208 mg of sodium per serving (53% 53% of daily value)
The American Heart Association recommends a daily sodium limit of 2,300 mg, and ideally 1,500 mg for most adults to lower blood pressure.
Tips to Reduce Sodium
-
Reduce Pickling Salt-25%
The pickling salt is the primary sodium source; reduce the amount by half to significantly lower the sodium content while still providing some preservation.
-
Increase Acidity-10%
Add a tablespoon of lemon juice or apple cider vinegar to the brine to maintain a sharp, tangy flavor profile with less salt.
-
Amplify Aromatics-5%
Increase the amount of fresh garlic and red pepper flakes to create a bolder, spicier taste that distracts the palate from the reduction in salt.
-
Enhance with Fresh Herbs
Add extra fresh dill weed and mustard seeds to maximize the natural, savory depth of the pickles without adding any sodium.
Recipe FAQs
How do I make my pickles shelf stable?
Process the jars in a water bath canner for 15 minutes. This heat treatment creates a vacuum seal that prevents spoilage at room temperature.
What are shelf stable pickles?
Pickles that can be stored safely in a pantry. They are preserved using a specific ratio of acid and heat processing to eliminate microorganisms.
How long do shelf stable pickles last?
About one year in a cool, dark place. Once the jar is opened and the seal is broken, move them to the refrigerator where they last 3-4 months.
Do homemade dill pickles in vinegar need to be refrigerated?
No, provided they are properly canned. After cooling for 24 hours and confirming the lids have popped, they are safe for pantry storage.
How to make homemade pickles with white vinegar?
Boil a brine of distilled vinegar, filtered water, pickling salt, sugar, and spices. Pour the boiling liquid over cucumbers packed in jars with garlic and dill, then process in a water bath. For a fresh version without the canning process, try an easy cucumber salad.
How to make homemade dill pickle juice?
Combine 4 cups white distilled vinegar, 4 cups filtered water, 1/4 cup pickling salt, and 1 tbsp sugar in a saucepan. Bring to a rolling boil with mustard seeds, peppercorns, and red pepper flakes until dissolved.
Is it true that you must refrigerate homemade pickles immediately after processing?
No, this is a common misconception. You must allow the jars to cool undisturbed for 24 hours before moving them to your pantry.
Shelf Stable Dill Pickles

