Homemade M&M Cookies: Soft and Chewy
- Time: Active 140 minutes, Passive 10 minutes, Total 150 minutes
- Flavor/Texture Hook: Shatter crisp edges with a velvety, chewy center
- Perfect for: School bake sales, cozy rainy afternoons, or neighborhood potlucks
- Baking The Most Whimsical mm cookies
- Secrets To Soft And Chewy Centers
- Component Analysis And Ingredient Deep Dive
- Selecting The Finest Sweet Elements
- Tools For A Successful Bake
- Step By Step To Golden Perfection
- Fixing Common Cookie Baking Blunders
- Adjusting The Batch Size Successfully
- Debunking Common Cookie Baking Myths
- Storing Your Treats For Later
- Styling Your Cookies For The Crowd
- Recipe FAQs
- 📝 Recipe Card
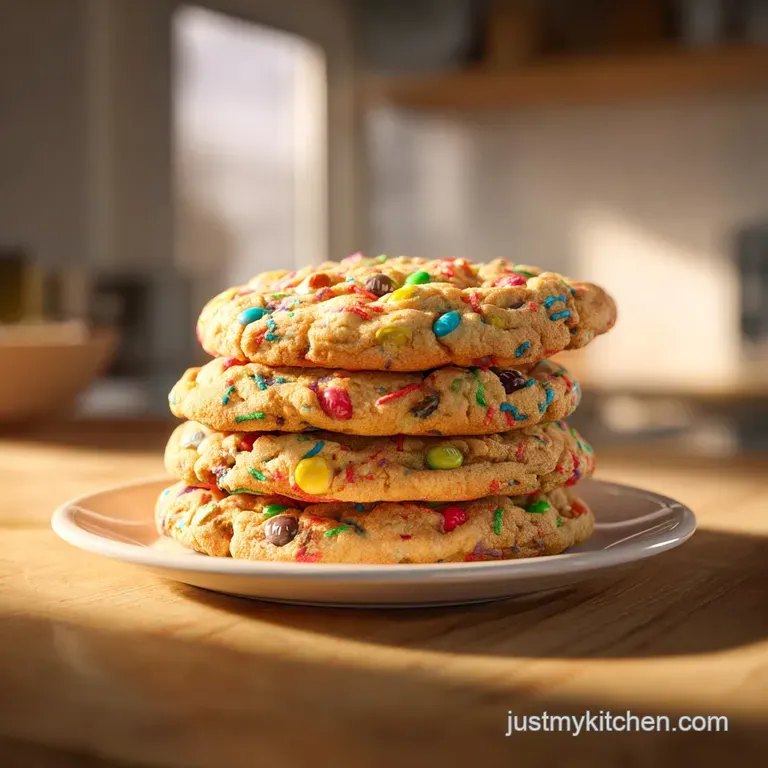
Baking The Most Whimsical mm cookies
The air in my kitchen currently smells like a dreamscape of toasted caramel and warm vanilla. There is something truly magical about the moment a tray of these colorful treats slides out of the oven, the candy shells gleaming like little gemstones against a golden brown backdrop.
I remember making these for my nephew's primary school graduation, and the look of sheer joy on those kids' faces was worth every single gram of flour spent. It wasn't just about the sugar; it was about that specific, nostalgic aroma that fills a home and makes everyone gravitate toward the cooling rack.
We aren't just making a basic biscuit here; we are crafting a memory. These mm cookies are designed to be substantial, with enough structure to hold those heavy milk chocolate candies but a heart that stays soft for days.
If you've ever had a cookie that turned into a hockey puck by the next morning, you know the heartbreak I'm talking about. We're avoiding that today with a few specific techniques that feel like kitchen alchemy.
Right then, let's get into why this particular method is the one you'll keep in your recipe tin forever. We're focusing on the way the sugars interact with the butter to create that signature chew, and how a little bit of patience in the fridge transforms a good dough into a legendary one.
Trust me, the wait is the hardest part, but your taste buds will thank you when they meet that first warm, chocolatey bite.
Secrets To Soft And Chewy Centers
Understanding how our ingredients behave under heat is the key to moving from a novice baker to a kitchen wizard. We want to manipulate the proteins and fats to give us the exact texture we crave.
- Cold Cure Hydration: Resting the dough for 140 minutes allows the 390g of all purpose flour to fully absorb the moisture from the eggs and vanilla. This prevents the cookies from spreading too thin and creates a more complex, butterscotch like flavor profile.
- The Aeration Balance: Beating the 225g of softened butter with the sugars for 5 minutes incorporates tiny air pockets. These pockets expand in the heat, giving us that tender crumb that contrasts so beautifully with the crunchy candy shells.
- Sugar Ratio Magic: Using 200g of light brown sugar compared to only 100g of granulated sugar increases the hygroscopic nature of the dough. This means the cookies literally pull moisture from the air, keeping them soft and velvety long after they've cooled.
- Sodium Bicarbonate Lift: The 1 tsp of baking soda reacts with the acidic molasses in the brown sugar. This creates a gentle rise and encourages browning, which is where those deep, toasted notes come from.
| Premium Ingredient | Budget Alternative | Flavor Impact | Savings |
|---|---|---|---|
| Brand name M&Ms | Store brand chocolate buttons | Slightly thicker shells; less vibrant colors | Save $2-3 per batch |
| Pure Vanilla Extract | Vanilla Bean Paste | More intense aroma; visible specks | Costs $5-8 more |
| European Butter | Standard Unsalted Butter | Less "fatty" mouthfeel; slightly more water content | Save $2-4 per pound |
Choosing the right components doesn't always mean the most expensive ones, but it does mean knowing how they affect the final result. For instance, if you're looking for another fun variation to try later, you might enjoy the texture of No Bake Monster Cookie Bars which use similar colorful mix ins but a totally different prep style.
Component Analysis And Ingredient Deep Dive
Every gram in this recipe has a specific job to do. When we look at the 390g of all purpose flour, we're looking at the skeleton of our cookie. Without it, we'd just have a puddle of melted chocolate and sugar.
| Ingredient | Science Role | Pro Secret |
|---|---|---|
| 225g Unsalted Butter | Provides fat for tenderness and carries flavor | Use butter at 65°F (18°C) so it holds air during the creaming stage |
| 200g Light Brown Sugar | Adds moisture and creates a chewy, dense texture | Pack it firmly into the cup to ensure you get the full molasses hit |
| 2 Large Eggs | Acts as the primary binder and provides structure | Room temperature eggs emulsify better with the fat for a smoother dough |
Using the right amount of salt is often overlooked in sweets. The 0.5 tsp of fine sea salt isn't there to make things salty; it's there to brighten the chocolate and cut through the richness of the butter. It’s like turning up the volume on a favorite song.
Selecting The Finest Sweet Elements
To get the best results, stick to the weights provided in the schema. Measuring by weight rather than volume is the single biggest trick I ever learned to ensure my bakes come out the same every single time.
- 390g All purpose flour: The foundation. Why this? Provides enough protein for structure without making the cookies tough or bread like.
- Substitute: 1:1 gluten-free baking blend (ensure it contains xanthan gum).
- 1 tsp Baking soda: The leavener. Why this? Reacts with brown sugar to create lift and beautiful golden browning.
- Substitute: 3 tsp Baking powder (though the texture will be slightly more cake like).
- 0.5 tsp Fine sea salt: The flavor enhancer. Why this? Balances the sweetness and highlights the cocoa notes in the chocolate.
- Substitute: 0.5 tsp Table salt (though sea salt has a cleaner finish).
- 225g Unsalted butter: The fat source. Why this? Softened butter is essential for trapping air during the 5 minute creaming process.
- Substitute: Salted butter (just omit the extra 0.5 tsp of sea salt).
- 200g Light brown sugar: The moisture trap. Why this? High molasses content ensures a chewy, soft center that lasts for days.
- Substitute: Dark brown sugar for a deeper, more intense molasses flavor.
- 100g Granulated sugar: The crisp factor. Why this? Helps the edges get that iconic "shatter" texture when you bite in.
- Substitute: Caster sugar for an even finer crumb and quicker dissolving.
- 2 Large eggs: The emulsifier. Why this? Binds the fats and liquids together for a cohesive, rich dough.
- Substitute: 1/2 cup Unsweetened applesauce (note: this will make the cookies much softer and puffier).
- 2 tsp Pure vanilla extract: The aromatic. Why this? Provides the classic "bakery" scent and rounds out the sugar flavors.
- Substitute: 1 tsp Almond extract for a nutty, festive twist.
- 250g Milk chocolate M&Ms: The star. Why this? Provides a crunch and a creamy chocolate burst in every mouthful.
- Substitute: Dark chocolate M&Ms or Reese's Pieces for a different flavor profile.
- 90g Semi sweet chocolate chips: The extra layer. Why this? Adds pockets of melted chocolate that contrast with the candy shells.
- Substitute: Chopped chocolate bars for irregular, gooey "pools" of cocoa.
Chef's Tip: If you have an extra ten minutes, brown half of your butter and then let it solidify back to a soft state before creaming. It adds a nutty, toasted aroma that is absolutely hypnotic.
Tools For A Successful Bake
You don't need a professional kitchen, but a few specific items make the process much smoother. A stand mixer is your best friend here because it allows you to walk away while that butter and sugar are aerating for those crucial 5 minutes.
- Stand Mixer: Vital for the heavy duty creaming of the butter and sugars.
- Digital Kitchen Scale: To ensure your 390g of flour is exact every time.
- Large Rubber Spatula: For folding in the candies without breaking their delicate shells.
- 3 Tablespoon Cookie Scoop: This ensures every cookie is exactly the same size, so they bake evenly.
- Parchment Paper or Silicone Mats: Prevents sticking and ensures the bottoms don't get too dark.
- Wire Cooling Rack: Essential for letting air circulate so the bottoms don't get soggy from steam.
step-by-step To Golden Perfection

Follow these steps closely, and keep an ear out for the sounds of the kitchen the whir of the mixer and the quiet "clink" of the candies against the bowl are all part of the dance.
- Cream the Base: In a stand mixer, beat the 225g softened butter, 200g light brown sugar, and 100g granulated sugar on medium high for 3 to 5 minutes until pale and whipped. Note: This aeration is what prevents a heavy, greasy cookie.
- Incorporate Binders: Add the 2 large eggs one at a time, followed by the 2 tsp vanilla extract. Mix only until the yellow streaks disappear. Note: Over mixing here can lead to a tough, rubbery texture.
- Blend Dry Ingredients: Set the mixer to the lowest setting and add the 390g flour, 1 tsp baking soda, and 0.5 tsp salt. Stop when a few streaks of flour remain.
- Add the Gems: Fold in the 250g M&Ms and 90g chocolate chips by hand using a spatula. Note: Using the mixer for this stage will crack the candy shells and bleed the colors.
- Portion the Dough: Scoop the dough into 3 tablespoon mounds and place them on a tray.
- The Cold Cure: Cover and refrigerate for 140 minutes. Smell the dough now; you'll notice the vanilla and sugar starting to smell like rich toffee.
- Heat the Oven: Preheat your oven to 350°F (175°C) and line your baking sheets.
- The Final Bake: Space the chilled mounds 2 inches apart and bake for 10 minutes until edges are golden but centers remain soft.
- The Cooling Phase: Let them sit on the hot sheet for 5 minutes before moving to a wire rack. The aroma will be peaking right about now!
Fixing Common Cookie Baking Blunders
Even the best of us have bad days in the kitchen. If your treats aren't looking quite right, don't panic! Most cookie issues can be traced back to temperature or measurement.
Why Your Cookies Spread Too Much
If your cookies turned into a giant sheet cake, your butter was likely too warm or you skipped the 140 minute chill. When the fat is too soft, it melts in the oven before the flour has a chance to set the structure.
Always ensure your butter is "cool room temp" it should yield to pressure but not be shiny or greasy.
The Mystery of the Hard Cookie
Over baking is the usual suspect here. Remember that cookies continue to cook on the hot tray after they leave the oven. If they look "done" in the middle while they are still in the oven, they are already over baked. Take them out when the edges are set but the center still looks slightly underdone and "puffy."
| Problem | Root Cause | Solution |
|---|---|---|
| Cracked M&Ms | Rough mixing | Always fold candies in by hand with a soft spatula |
| Pale, Soft Edges | Oven temp too low | Verify your oven with a thermometer; use 350°F (175°C) |
| Dark, Burnt Bottoms | Thin baking sheet | Use a heavy duty rimmed baking sheet or double up the pans |
Common Mistakes Checklist
- ✓ Check your baking soda for freshness by dropping a pinch in vinegar (it should bubble aggressively).
- ✓ Don't skip the 140 minute chill; it’s the difference between a flat cookie and a thick, chewy one.
- ✓ Always use room temperature eggs to ensure a smooth, emulsified batter.
- ✓ Measure your flour by weight (390g) to avoid the "packing" error that happens with cups.
- ✓ Space your cookies at least 2 inches apart to allow for proper heat circulation.
Adjusting The Batch Size Successfully
Sometimes you need a mountain of cookies for a party, and other times you just want a small treat for a movie night. Scaling these requires a bit of care with the chemistry.
When cutting the recipe in half, use one large egg and one egg yolk to maintain the richness. For the 390g of flour, you'll need 195g. You can reduce the baking time by about 2 minutes if you make smaller 1.5 tablespoon scoops.
If you are doubling the recipe for a big event, I recommend making two separate batches in the stand mixer rather than trying to cram everything in at once. Most home mixers struggle with that much heavy dough, which leads to uneven mixing. Keep the salt and spices at 1.5x rather than a full 2x to prevent them from becoming overwhelming. If you find yourself with extra dough, you could even press it into a pan to make Chocolate Kiss Cookies style bars for a different presentation!
| Thickness | Internal Temp | Rest Time | Visual Cue |
|---|---|---|---|
| 1/2 inch | 175°F (80°C) | 5 mins | Edges are matte and golden brown |
| 3/4 inch | 180°F (82°C) | 10 mins | Center loses its glossy, wet look |
| 1 inch | 185°F (85°C) | 15 mins | Slight resistance when pressed on top |
Debunking Common Cookie Baking Myths
One big myth is that "more flour makes a thicker cookie." While true, it also makes a dryer, tougher cookie. The real secret to thickness is chilling the dough and using the right ratio of sugars, not just dumping in extra flour.
Another common misconception is that you can substitute margarine 1:1 for butter. Margarine has a higher water content, which will cause your mm cookies to spread excessively and lack that deep, rich flavor that only 225g of real butter can provide.
Finally, people often think you need to grease the cookie sheet. Don't do it! The high fat content in the 225g of butter is enough to prevent sticking, and adding extra grease to the pan can actually cause the bottoms of the cookies to fry and spread too quickly.
Storing Your Treats For Later
To keep that "just baked" texture, store your cooled cookies in an airtight container with a single slice of white bread. The cookies will absorb the moisture from the bread, staying soft and velvety for up to 5 days.
For freezing, I love to freeze the raw dough mounds. Once you've scooped them into 3 tablespoon balls, freeze them on a tray for an hour, then toss them into a freezer bag. They’ll stay fresh for 3 months.
When you're ready for a treat, just bake them directly from frozen, adding an extra 2 minutes to the cook time.
Zero Waste Tips
Don't throw away those broken M&M bits at the bottom of the bag! Save them in a jar in the freezer. They make a fantastic topping for vanilla ice cream or can be swirled into a morning bowl of oatmeal for a bit of whimsical fun.
If you have leftover cookies that have finally gone stale, crush them up and use them as a crust for a cheesecake or a topping for a chocolate pudding.
Styling Your Cookies For The Crowd
If you want that "pro baker" look, reserve about 50g of the M&Ms from the initial mix. As soon as the cookies come out of the oven, gently press 3 or 4 fresh candies into the soft tops. This makes the colors "pop" and ensures everyone knows exactly what's inside.
Another great trick is the "cookie scoot." If your cookies come out of the oven looking a bit wonky or oval, take a large circular glass or a round cookie cutter and place it over the hot cookie. Gently move the glass in a circular motion, "scooting" the edges of the cookie into a perfect circle.
Do this while they are still hot and pliable, and you'll have perfectly uniform treats every time.
Finally, a tiny sprinkle of flaky sea salt on top right after baking can make the colors look even more vibrant and adds a sophisticated touch to the sweet chocolate. It’s a simple addition that makes people ask, "What is that secret ingredient?" It’s all about those little details that turn a simple tray of mm cookies into the highlight of the gathering.

Recipe FAQs
Can I use M&Ms instead of chocolate chips?
Yes, you can substitute, but keep the total weight of inclusions consistent. Swapping them preserves the texture, much like how you might adjust the fruit ratios in our make-ahead desserts to suit your preferences.
Is it true Snoop Dogg has a favorite cookie?
No, this is a common misconception. There is no official record of Snoop Dogg having a specific signature cookie recipe, though he is widely known for his love of various baked goods.
What is an M&M cookie?
It is a classic butter based cookie dough studded with milk chocolate M&Ms. The recipe relies on creaming 225g of butter with sugar for 5 minutes to create a chewy, professional grade base.
Is it true Oprah has a favorite Maman cookie?
Yes, Oprah has famously featured the Maman Nutty Chocolate Chip Cookie on her "Favorite Things" list. While that specific bakery cookie uses nuts, this M&M version focuses on the classic chocolate-to-dough ratio.
How to ensure the cookies stay chewy?
Mix the eggs and vanilla only until the yellow streaks disappear. Over mixing at this stage develops too much gluten, which ruins the desired soft and chewy texture of the final bake.
How to bake these from frozen?
Place the frozen dough mounds directly onto the baking sheet and add 2 minutes to the 10-minute cook time. Using this method allows you to enjoy fresh, hot cookies whenever you need them without thawing the dough first.
How to get the perfect thick cookie shape?
Refrigerate the scooped 3-tablespoon mounds for at least 2 hours before baking. This mandatory chilling period solidifies the fats and hydrates the flour, preventing the dough from spreading into a thin, greasy disc during the 10-minute bake.
Classic M M Cookies
Ingredients:
Instructions:
Nutrition Facts:
| Calories | 250 kcal |
|---|---|
| Protein | 2.8 g |
| Fat | 11.1 g |
| Carbs | 34.4 g |
| Fiber | 0.8 g |
| Sugar | 21.0 g |
| Sodium | 96 mg |
