Simple Beef Taco Bake: Cheesy and Hearty
- Time: 10 min active + 20 min bake = Total 35 mins
- Flavor/Texture Hook: Bubbling, golden brown cheese with mahogany brown beef
- Perfect for: Busy weeknight dinners or feeding a hungry crowd
- Simple Beef Taco Bake
- Why Most Recipes Get This Wrong
- Recipe Specs
- Shopping List Breakdown
- Equipment Needed
- Step-by-Step Instructions
- Fixing Common Bake Mistakes
- Flavor Variations and Swaps
- Adjusting Serving Sizes
- Kitchen Myths
- Storage and Leftovers
- Plating and Finishing Touches
- High in Sodium
- Recipe FAQs
- 📝 Recipe Card
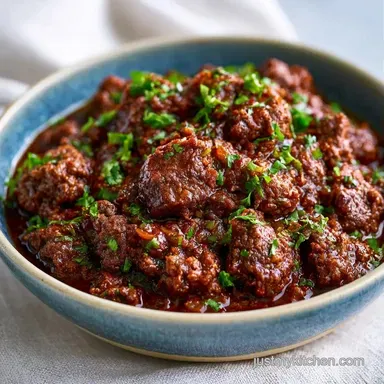
Simple Beef Taco Bake
The first thing that hits you is that sizzle - that aggressive, happy sound of ground beef hitting a hot pan with diced onions. Then comes the aroma: toasted cumin, smoky paprika, and garlic swirling together.
It's the kind of smell that makes everyone in the house wander into the kitchen asking, "What's for dinner?" before you've even finished browning the meat.
Forget the idea that you need to spend an hour meticulously filling individual shells or worrying about tortillas cracking. We've all been there, trying to balance a mountain of toppings on a taco only for it to collapse onto the plate. This recipe throws that stress out the window.
The Simple Beef Taco Bake is all about efficiency and comfort. It's a layered feast where the tortillas act as soft, savory dividers for a rich, glazed beef mixture and heaps of melted cheese. You get the same bold flavors, but it's served as a satisfying, hearty slice that holds together perfectly.
Why Most Recipes Get This Wrong
Most people treat a taco casserole like a stew, just dumping everything in a dish and hoping for the best. But that's how you end up with a soggy, mushy mess. The secret to a great bake is creating distinct layers and managing the moisture of the meat.
The Glaze Effect: Instead of leaving the beef runny or completely dry, we use a small amount of beef broth. This creates a thick, velvety glaze that clings to the meat, ensuring every bite is juicy without soaking the tortillas.
The Cheese Barrier: Putting a thin layer of cheese on the bottom of the pan is a total pro move. It creates a fat based shield that prevents the bottom tortillas from sticking or getting gummy.
Temperature Control: Many recipes suggest too high a heat, which burns the top cheese before the middle is hot. We keep it at 350°F to ensure a steady, even melt. For more on the nutritional value of the protein we use, check out the USDA FoodData on lean ground beef.
| Feature | Fast Bake Method | Classic Taco Night |
|---|---|---|
| Assembly Time | 10 minutes | 30+ minutes |
| Texture | Layered and melty | Individual and crisp |
| Clean up | One pan, one skillet | Multiple bowls and shells |
| Best For | Family dinner | Interactive party |
Recipe Specs
When you're planning your evening, knowing exactly how this fits into your schedule is key. This isn't a "slow burn" meal; it's a high impact, quick turnaround dish. I love it because it feels like a "fancy" baked meal but takes less time than ordering takeout.
The timing is tight. You've got 10 minutes of prep, which is mostly just dicing an onion and gathering your cheese. The 20 minutes in the oven is where the magic happens, as the flavors fuse and the cheese browns.
The total 35 minutes from start to finish makes this a lifesaver on Tuesdays.
If you're looking for a way to add even more depth to the meat, you can use a homemade chili seasoning instead of the store-bought packets. It adds a smokier, more complex profile that pairs beautifully with the Monterey Jack cheese.
Shopping List Breakdown
Choosing the right ingredients is where you can really move the needle on flavor. Don't just grab the first thing you see on the shelf; a few specific choices make a huge difference.
The Beef: Use 80/20 or 90/10 lean ground beef. If you go too fatty, you'll end up with a pool of oil at the bottom of your pan, which ruins the texture. If it's too lean, the meat can get grainy.
The Cheese Blend: I use a mix of Sharp Cheddar and Monterey Jack. The Cheddar brings that punchy, salty flavor, while the Monterey Jack provides the velvety, gooey melt. Using just one or the other leaves the dish feeling one dimensional.
The Tortillas: Small flour tortillas are the way to go here. They are flexible and soak up the beef glaze without disintegrating. Corn tortillas can work, but they tend to be more brittle and can leave a "grainy" feel in a layered bake.
| Ingredient | Science Role | Pro Secret |
|---|---|---|
| Beef Broth | Moisture/Binder | Reduces to a glaze, preventing dry meat |
| Sharp Cheddar | Flavor/Structure | Provides the "salt" and a golden crust |
| Flour Tortillas | Starch Layer | Acts as a sponge for the beef juices |
| Olive Oil | Heat Transfer | Helps onions translucent without burning |
Equipment Needed
You don't need a professional kitchen for this. In fact, the beauty of this dish is that it uses basic tools. I usually just use my standard 12 inch skillet and a rectangular baking dish.
A 9x13 inch baking dish is the gold standard here. It allows for enough surface area so the layers aren't too thick, which means the heat penetrates the center efficiently. If you use a deeper, smaller dish, you'll likely find the middle is still cold while the edges are overcooked.
For the beef, a stainless steel or cast iron skillet works best. These hold heat well, which is essential for getting that mahogany brown color on the meat. If you use a non stick pan, just keep an eye on the temperature so you don't burn the garlic.
Step-by-step Instructions
Let's crack on. Make sure your oven is preheating while you're working on the stove so everything is ready to go the moment the beef is glazed.
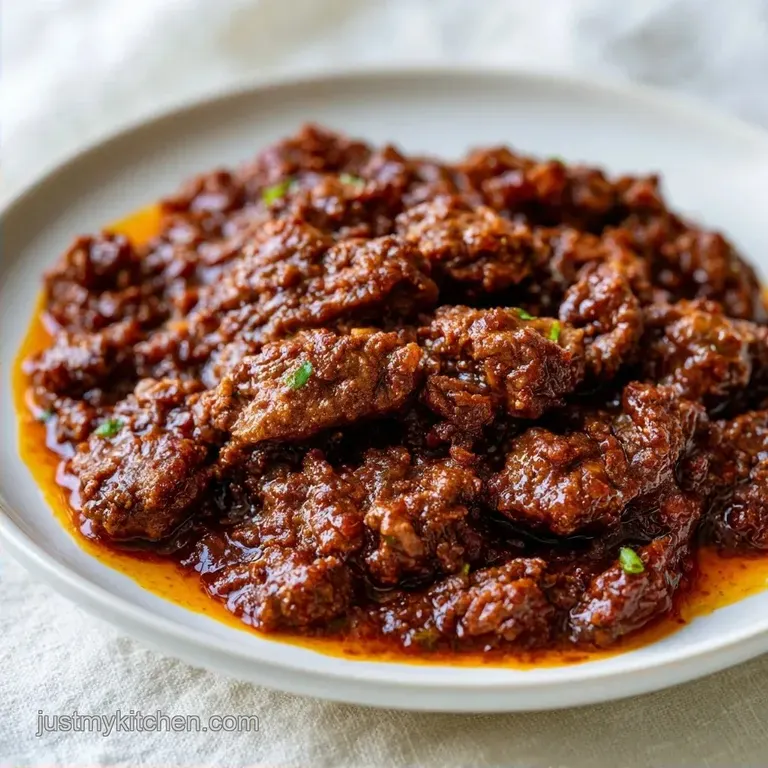
Heat olive oil in a skillet over medium high heat. Add the ground beef and diced onion, cooking until the beef is mahogany brown and the onions are translucent. Note: Don't rush the browning; this is where the flavor lives.
Stir in the minced garlic and taco seasoning. Cook for 1 minute until the spices smell aromatic and toasted.
Pour in the beef broth. Simmer until the liquid reduces into a thick glaze that coats the meat. Note: It should look glossy, not soupy.
Preheat oven to 350°F (175°C). Spread a thin layer of shredded cheese on the bottom of a 9x13 inch baking dish to prevent sticking.
Place a layer of tortillas over the cheese. Spread 1/3 of the beef mixture evenly across the tortillas, followed by a handful of cheese.
Repeat the layering process - tortilla, beef, cheese - until all ingredients are used. End with a generous layer of cheese on top.
Bake for 15-20 minutes until the cheese is bubbling and golden brown around the edges.
Remove from the oven and let rest for 5 minutes. Note: This is critical so the layers set and don't slide apart when you slice it.
Garnish with sour cream, chopped cilantro, diced tomato, sliced green onion, and lime wedges.
Fixing Common Bake Mistakes

Even with a Simple Beef Taco Bake, things can go sideways. Usually, it's a matter of moisture management. If your bake feels more like a soup than a casserole, you've likely skipped the reduction step.
Why Your Base Is Soggy
Sogginess happens when there's too much liquid in the beef mixture or when you skip the bottom cheese layer. The beef broth must be simmered down until it's a glaze. If it's still watery, it will seep into the tortillas and turn them into mush.
Solving the Dry Meat Issue
If the meat feels grainy or dry, you might have overcooked the beef before adding the broth, or used meat that was too lean. Adding a splash more broth or a tablespoon of sour cream into the beef mixture before layering can fix this.
Fixing the Uneven Melt
When the edges are burnt but the middle is barely melted, your oven may have hot spots or your layers are too thick. Ensure you're using a 9x13 dish and that your cheese is shredded finely for a more even melt.
| Problem | Root Cause | Solution |
|---|---|---|
| Mushy tortillas | Too much broth/liquid | Simmer beef until glossy glaze forms |
| Sticking to pan | No bottom fat barrier | Start with a layer of cheese first |
| Bland flavor | Under seasoned beef | Add a pinch of salt or more taco seasoning |
Common Mistakes Checklist
- ✓ Did you brown the beef fully before adding broth?
- ✓ Is the beef mixture a glaze and not a sauce?
- ✓ Did you put cheese on the very bottom of the pan?
- ✓ Did you let the bake rest for 5 minutes before cutting?
- ✓ Are the tortillas overlapping slightly to seal the edges?
Flavor Variations and Swaps
Once you've mastered the Simple Beef Taco Bake, you can start playing with the ingredients. I often tweak this depending on what's in the fridge or who I'm feeding. If you're serving this for a big party, it's a great companion to authentic homemade tamales, creating a full Mexican inspired spread.
Adding Spicy Heat
If you like a kick, stir a diced jalapeño into the beef while it's browning. For a slower, deeper heat, add a teaspoon of chipotle peppers in adobo sauce to the beef broth. This gives it a smoky, restaurant style flavor.
Incorporating Creaminess
For a richer experience, spread a thin layer of refried beans on the tortillas before adding the beef. This adds another structural layer and a velvety texture that contrasts with the melted cheese.
Swapping for Low Carb
If you're avoiding flour, you can swap the tortillas for thinly sliced zucchini rounds or large leaves of collard greens. Keep in mind that zucchini releases more water, so you may need to bake the dish for an extra 5-10 minutes to evaporate the excess moisture.
Making it Plant Based
Swap the beef for lentils or crumbled firm tofu. Use vegetable broth instead of beef broth and opt for a vegan mozzarella or cheddar blend. The layering technique remains exactly the same.
| Original Ingredient | Substitute | Why It Works |
|---|---|---|
| Flour Tortillas | Corn Tortillas | gluten-free option. Note: Can be drier/more brittle |
| Lean Ground Beef | Ground Turkey | Lower fat. Note: Requires more seasoning to avoid blandness |
| Beef Broth | Vegetable Broth | Vegetarian base. Note: Lighter flavor profile |
| Sharp Cheddar | Pepper Jack | Adds heat. Note: More spicy than traditional cheddar |
Adjusting Serving Sizes
Scaling this recipe is pretty straightforward, but you can't just double everything blindly. The thermodynamics of a baking dish change as you add more volume.
Scaling Down (Half Batch): If you're cooking for two, use an 8x8 inch square pan. Reduce the baking time by about 20% (around 12-15 minutes) because the smaller mass heats through faster. Use 5 tortillas and halve the beef and cheese.
Scaling Up (Double Batch): For a crowd, use two 9x13 pans rather than one giant deep dish. If you stack the layers too high, the middle won't heat through. Increase the spices to 1.5x instead of 2x - sometimes doubling spices can make the dish taste "metallic" or overly salty.
| Batch Size | Pan Size | Bake Time | Cheese Adjustment |
|---|---|---|---|
| Half (4 servings) | 8x8 inch | 12-15 mins | Exactly 1/2 |
| Standard (8 servings) | 9x13 inch | 15-20 mins | As listed |
| Double (16 servings) | Two 9x13 inch | 20-25 mins | 1.75x total |
Kitchen Myths
There are a few things people tell you about taco bakes that just aren't true. Let's clear those up so you don't waste your time.
Myth: You must pre fry the tortillas. Some people say you need to fry the tortillas in oil first to prevent them from getting soggy. In a layered bake, this is unnecessary. The beef glaze and the cheese barrier do the work for you. Pre frying just adds extra grease to an already rich dish.
Myth: Lean beef means less flavor. There's a belief that you need high fat beef for a "real" taco taste. Actually, too much fat just washes out the spices. By using lean beef and reducing the broth into a glaze, you concentrate the flavor rather than diluting it in oil.
Myth: You can't freeze a taco bake. People think the tortillas will turn into mush. While it's better fresh, you can absolutely freeze this. The trick is to under bake it slightly and finish the browning process when you reheat it.
Storage and Leftovers
A Simple Beef Taco Bake is one of those rare dishes that actually tastes better the next day. The flavors have more time to meld, and the tortillas fully absorb the savory beef essence.
Fridge Storage: Store leftovers in an airtight container for up to 3-4 days. To keep it from drying out, cover the slice with a damp paper towel before microwaving.
Freezer Guidelines: You can freeze individual slices for up to 2 months. Wrap them tightly in foil and then place them in a freezer bag. To reheat, thaw in the fridge overnight and pop them in the oven at 350°F for 10 minutes.
Zero Waste Tips: Don't throw away the ends of your onion or the garlic skins. I toss mine into a freezer bag to make a quick veggie stock. Also, if you have leftover cilantro stems, chop them finely and stir them into the beef mixture - they have more flavor than the leaves!
Plating and Finishing Touches
The magic of this dish is the contrast. You have a hot, salty, cheesy base, so you need cold, fresh, acidic toppings to cut through that richness. This is what takes it from a "casserole" to a "meal."
The Fresh Contrast: Add the sour cream and diced tomatoes only after the bake comes out of the oven. If you bake the sour cream, it breaks and becomes oily. The cold cream against the bubbling cheese is a sensory win.
The Acid Hit: Never skip the lime wedges. A squeeze of fresh lime juice right before eating wakes up the heavy fats in the cheese and beef, making the whole dish taste brighter.
The Garnish Game: Scatter the green onions and cilantro liberally. Not only does the green pop against the orange cheese, but the raw onion provides a sharp crunch that complements the soft texture of the bake.
Slicing Technique: Use a serrated knife to cut the Simple Beef Taco Bake. This allows you to saw through the toasted cheese and tortillas without squishing the layers together, keeping those beautiful distinct lines visible on the plate.
High in Sodium
1100 mg 1,100 mg of sodium per serving (48% 48% of daily value)
The American Heart Association recommends a daily limit of 2,300 mg of sodium to maintain heart health and reduce the risk of hypertension.
Tips to Reduce Sodium
-
DIY Taco Seasoning-30%
Replace the store-bought taco seasoning with a homemade blend of chili powder, cumin, paprika, and garlic powder to eliminate hidden salts.
-
Swap Beef Broth-30%
Use low-sodium or no-salt added beef broth, or substitute with water and a squeeze of lime for a similar depth of flavor.
-
Moderate the Cheese-15%
Reduce the quantity of shredded cheddar and Monterey Jack by half, or choose a lower sodium Swiss or fresh mozzarella.
-
Alternative Tortillas-10%
Switch from flour tortillas to corn tortillas, which typically contain significantly less sodium per serving.
-
Enhance with Freshness
Increase the amount of fresh cilantro, lime juice, and diced tomatoes to provide a flavor punch that compensates for less salt.
Recipe FAQs
What is a great way to use ground beef for a crowd?
Yes, this Beef Taco Bake is an ideal choice. It yields 8 servings and combines simple prep with deep flavor. For another high volume option, try a ground beef casserole.
How to prevent the tortillas from sticking to the pan?
Spread a thin layer of cheese on the bottom of the 9x13 inch baking dish. This creates a melted barrier that keeps the tortillas from adhering to the surface.
Can I use only one type of cheese instead of Cheddar and Monterey Jack?
Yes, you can use a single variety. While the blend offers both sharpness and a smooth melt, utilizing just one of the two approved cheeses will still deliver a great result.
How to reheat leftover taco bake so it doesn't dry out?
Cover the slice with a damp paper towel before microwaving. This technique maintains moisture in the tortillas and prevents them from becoming brittle.
Is it true that ground beef should be barely browned before adding broth?
No, this is a common misconception. You must cook the beef until it is mahogany brown to ensure the most flavorful base for the bake.
How to get the beef filling to have a thick glaze?
Simmer the beef broth in the skillet after the seasonings are toasted. Let the liquid reduce until it transforms into a thick glaze that clings to the meat.
Can this be frozen for future meals?
Yes, individual slices stay fresh for up to 2 months. Wrap each slice tightly in foil and store them in a freezer bag to avoid freezer burn.
Simple Beef Taco Bake