Salted Caramel Cookie Bars: Soft and Buttery
- Time: Active 25 minutes, Passive 35 minutes, Total 60 minutes
- Flavor/Texture Hook: Fudgy, salty, and buttery with a velvety caramel center
- Perfect for: Potlucks, holiday gifting, or a decadent weekend treat
- Why This Recipe Works Every Time
- Essential Recipe Specifications and Goals
- Ingredient Analysis and Pro Secrets
- Selecting Your Kitchen Tools
- Steps for Achieving Perfection
- Troubleshooting Common Baking Challenges
- Creative Variations and Swaps
- How to Store and Keep Fresh
- Pro Presentation and Plating Tips
- Recipe FAQs
- 📝 Recipe Card
The air in my kitchen currently smells like a dreamscape of toasted vanilla and bubbling sugar. There is a specific moment when the butter and brown sugar meet in the mixer, and the aroma shifts from simple ingredients to something deeply nostalgic, like a warm hug on a rainy afternoon.
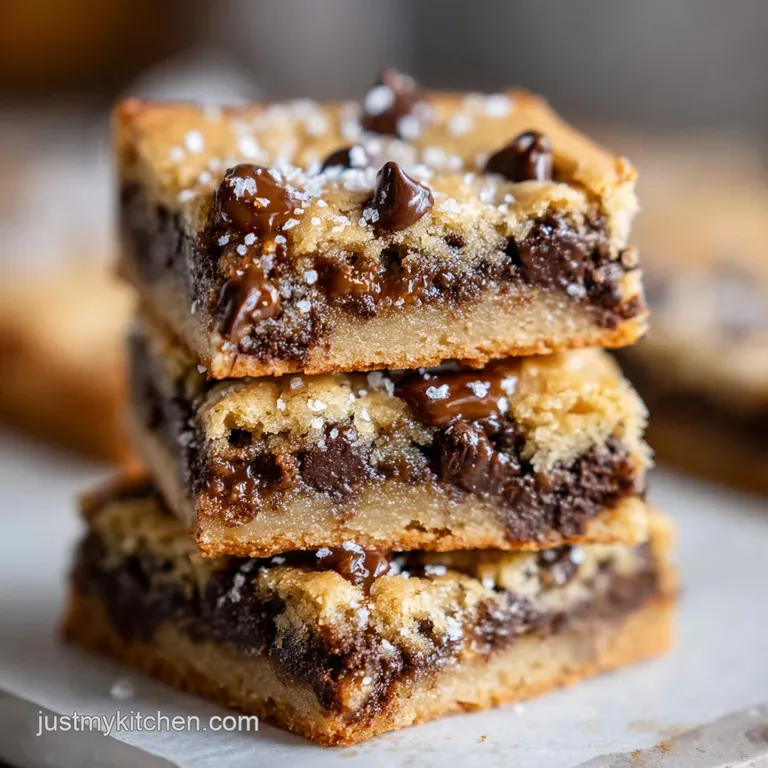
As I pulled a pan of these chocolate chip salted caramel cookie bars out of the oven, the sight of the golden, craggy top with tiny rivers of molten caramel peeking through was enough to make anyone forget their worries.
It's a sensory experience that starts with the sizzle of the whisk and ends with the satisfying shatter of flaky sea salt against a soft, buttery crumb.
I remember the first time I tried to make a similar version of this recipe years ago. I didn't understand the magic of stabilization, and I ended up with a delicious but structurally chaotic mess where the caramel simply migrated to the edges and hardened into a tooth shattering candy. It was a sticky disaster.
Since then, I've learned that the secret lies in how we treat the caramel and the temperature of our fats. These bars aren't just a dessert; they are a study in contrasting textures and the beautiful balance between the bitterness of dark chocolate and the silky sweetness of homemade caramel.
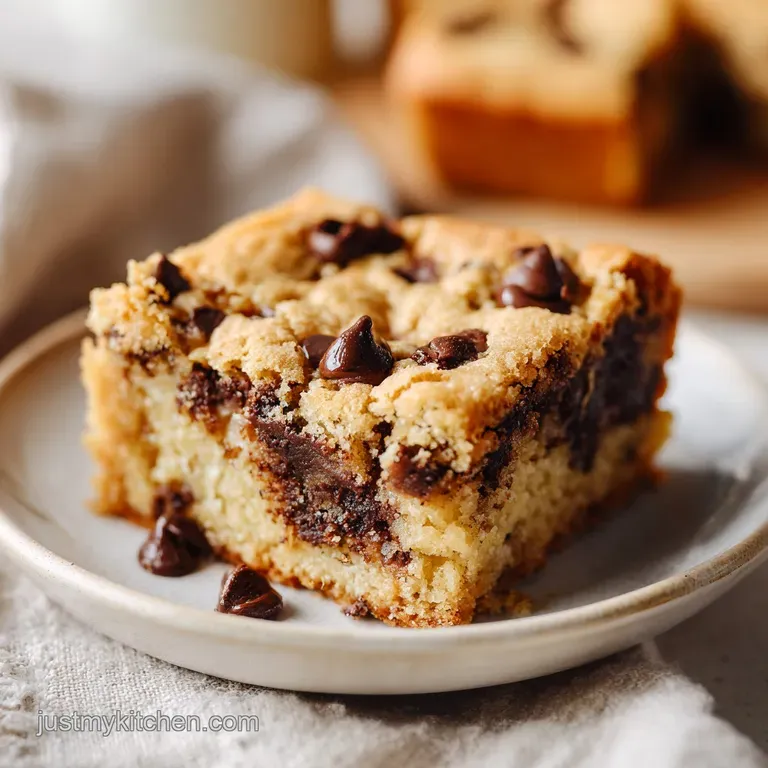
You are going to love the way these bars feel in your hand. They have a weight to them that promises satisfaction, yet they remain soft enough to melt away the second they hit your tongue.
We are using 70% dark chocolate chips here because they provide a necessary backbone to the sweetness of the light brown sugar and the soft caramels. If you use milk chocolate, the whole thing becomes a bit too sugary, but that dark cacao punch brings a sophisticated edge that makes it impossible to stop at just one square.
Let's walk through the whimsy and the science of making these treats absolutely perfect every single time.
Why This Recipe Works Every Time
Understanding the "why" behind your baking transforms you from someone who just follows instructions into a kitchen wizard. These bars are a bit more complex than a standard cookie, so we need to ensure the physics of the layers are working in our favor.
- Structural Integrity: Using a two thirds base of dough creates a sturdy floor that prevents the heavy caramel from seeping through to the bottom of the pan and burning.
- Starch Softness: Adding cornstarch to the dry ingredients inhibits excessive gluten development, ensuring the bars stay soft and tender rather than becoming bready or tough.
- Caramel Stabilization: Whisking a tablespoon of flour into the melting caramel and cream creates a stable emulsion that stays soft and "gooey" even after the bars have completely cooled.
- Moisture Retention: Light brown sugar contains molasses, which is hygroscopic, meaning it pulls moisture from the air to keep your bars fudgy for days.
- Salt Contrast: Flaky sea salt doesn't just add flavor; it suppresses our perception of bitterness in the chocolate and enhances the aromatic qualities of the vanilla bean paste.
| Feature | Classic Method (This Recipe) | Fast Alternative (Shortcut) |
|---|---|---|
| Texture | Soft, multi layered, and fudgy | Chewy but often one dimensional |
| Flavor Depth | Rich vanilla and dark cacao notes | Primarily sugar forward |
| Caramel State | Remains velvety and pull able | Can become hard or overly runny |
It is fascinating how a simple addition like cornstarch can change the entire mouthfeel of a bake. When the starch granules are heated, they absorb moisture and swell, creating a barrier that keeps the crumb delicate.
This is especially important in a bar recipe where the weight of the toppings can often crush a standard cookie structure.
Essential Recipe Specifications and Goals
Before we reach for the flour, we need to have our roadmap ready. Baking is a game of precision, and while I love a whimsical approach, the numbers are what keep our chocolate chip salted caramel cookie bars from failing.
We are aiming for 24 perfectly sized squares that are robust enough to be held but soft enough to be decadent.
| Servings | Ingredient Adjustments | Pan Size | Cook Time |
|---|---|---|---|
| 12 bars | Halve all ingredients (use 1 egg) | 8x8 inch square | 28-32 mins |
| 24 bars | Standard recipe quantities | 9x13 inch metal | 35 mins |
| 48 bars | Double ingredients (work in batches) | Two 9x13 pans | 35 mins each |
One thing I've learned the hard way is that the type of pan you use matters immensely. A glass dish holds heat differently than a light colored metal pan. For these bars, a metal pan is the gold standard because it conducts heat quickly and evenly, ensuring the edges get that beautiful golden brown crispness without the center remaining raw.
If you must use glass, you might need to extend the bake time by about five minutes, but keep a close eye on it!
Ingredient Analysis and Pro Secrets
The ingredients are the soul of the bake. For this salted caramel cookie bar recipe, we aren't just looking for sweetness; we are looking for a symphony of flavors that play off one another.
Using vanilla bean paste instead of extract, for instance, adds those beautiful little black flecks and a much deeper, floral aroma that survives the heat of the oven better than liquid extract.
| Ingredient | Science Role | Pro Secret |
|---|---|---|
| Unsalted Butter | Fat for tenderness and flavor | Use "European style" butter for higher fat content and less water |
| Vanilla Bean Paste | Aromatic complexity | Rub the paste into the sugar before creaming to release more oils |
| Cornstarch | Protein buffering | Sift with the flour to ensure no clumps remain in the delicate dough |
| Heavy Cream | Fat in-water emulsion | Ensure the cream is room temp before adding to hot caramel to prevent seizing |
Chef's Note: If you find yourself out of vanilla bean paste, you can substitute it with an equal amount of high-quality vanilla extract, but the flavor won't be quite as "bakery professional."
When selecting your dark chocolate chips, look for something in the 60% to 70% cacao range. Anything higher might be too bitter for a crowd pleaser, and anything lower starts to lose that distinct chocolate punch. I personally love using the Ghirardelli 60% Bittersweet chips because they melt beautifully while maintaining their shape just enough to provide a nice texture. For a similar flavor profile in a different format, you might enjoy reading about my Peanut Butter Cookie with Sea Salt which also masters that delicate balance of savory and sweet.
Selecting Your Kitchen Tools
To make the best salted caramel cookie bars, you don't need a professional kitchen, but you do need a few specific items to ensure the textures are just right. A stand mixer is your best friend here because creaming butter and sugar by hand is a workout that most of us would rather skip.
- Stand Mixer: Using a paddle attachment allows you to aerate the butter without incorporating too much air, which would make the bars cakey.
- 9x13 Metal Pan: Choose a straight sided pan for those perfect, professional looking square edges.
- Parchment Paper: This is non negotiable. You need to create a "sling" so you can lift the entire block of bars out of the pan once they have cooled.
- Heavy Bottomed Saucepan: This prevents the caramel from scorching. Thin pans have "hot spots" that can turn your sugar bitter in seconds.
- Whisk: A sturdy silicone or metal whisk is essential for emulsifying the cream, flour, and caramels into a smooth sauce.
The parchment paper sling is truly a "trust me on this" tip. Trying to cut these bars inside the pan is a recipe for scratched metal and mangled first pieces. By lining the pan, you ensure that every single bar, even the corner ones, comes out looking like it belongs in a magazine.
Steps for Achieving Perfection
Right then, let's get our hands into some flour and make some magic happen. Follow these steps closely, and pay attention to the sensory cues the smells and sights will tell you more than the timer ever could.
- Preheat and Prep. Set your oven to 350°F (175°C). Line your 9x13 inch metal pan with parchment paper, leaving an overhang on the long sides. Note: This ensures even heat and easy removal.
- Cream the Base. In your mixer, beat the 1 cup softened butter, 0.75 cup light brown sugar, and 0.5 cup granulated sugar for 3 to 4 minutes until the mixture looks pale, fluffy, and like soft clouds.
- Incorporate Liquids. Add the 2 large eggs one at a time, beating well after each. Mix in the 1 tablespoon vanilla bean paste until the aroma of vanilla fills the air.
- Fold Dry Ingredients. Gently stir in the 2.33 cups all purpose flour, 1 teaspoon baking soda, and 1 teaspoon cornstarch. Stop as soon as no white streaks remain to keep the bars tender.
- Add Chocolate. Fold in the 1.5 cups dark chocolate chips. Note: Stirring too much here can toughen the dough.
- Press the Base. Press exactly two thirds of this dough into the bottom of your pan. Use the back of a spoon or damp fingers to get an even layer until the bottom is completely covered.
- Melt the Caramel. In your heavy saucepan over medium low heat, combine the 14 oz soft caramels, 0.33 cup heavy cream, and 1 tablespoon flour. Whisk until you have a smooth, velvety liquid with no lumps.
- Layer and Salt. Pour the caramel over the dough base. Sprinkle the 1 teaspoon flaky sea salt evenly across the surface. The contrast of white salt on amber caramel is stunning.
- Crumble and Bake. Break the remaining dough into small bits and scatter them over the caramel. Bake for 35 minutes until the edges are a deep golden brown and the top smells like toasted sugar.
- The Long Wait. Let the bars cool in the pan for at least 2 hours. Note: This is the hardest part, but the caramel must set or it will run everywhere when sliced.
| Problem | Cause | Fix |
|---|---|---|
| Caramel is too hard | Overcooked the caramel mixture | Add a splash more cream next time; don't boil the caramel |
| Bars are greasy | Butter was too melted before mixing | Ensure butter is "room temp" (65°F), not oily or melty |
| Bottom is soggy | Underbaked base layer | Ensure the oven is fully preheated and use a metal pan |
Troubleshooting Common Baking Challenges
Even with the best intentions, sometimes the oven gods have other plans. But don't worry, most issues with homemade chocolate chip blondie bars can be fixed or avoided with a little bit of knowledge.
Dealing with Underbaked Centers
If you pull your bars out and the center looks like it’s still wobbling like a bowl of jelly, you likely need a few more minutes. However, remember that these bars carry a lot of "carryover heat." Because of the dense caramel layer, they will continue to cook for several minutes after they leave the oven.
If the edges are firm and brown, the center is usually just fine it just needs that 2 hour rest to firm up.
Why Your Caramel Seized
If your caramel turned into a grainy, clumpy mess while melting, it usually means a temperature shock occurred. If you add cold cream to warm caramels, the fat can separate. Always ensure your cream is at least room temperature.
If it does seize, keep whisking over very low heat; often, the emulsion will come back together with a little patience and gentle warmth.
Preventing a Greasy Surface
If you see pools of butter on top of your bars halfway through baking, your butter was likely too soft when you started creaming it. To prevent this, your butter should be cool to the touch but indent easily when pressed. If it's already greasy, you can gently dab the surface with a paper towel and finish the bake.
It won't be perfect, but it will still taste incredible!
Common Mistakes Checklist:
- ✓ Never skip the parchment paper; caramel sticks to metal like glue.
- ✓ Measure your flour using the "spoon and level" method to avoid dry bars.
- ✓ Don't overwork the dough once the flour is added; we want a soft crumb, not bread.
- ✓ Ensure the caramels are the "soft" chewy kind (like Kraft or Werther's Soft), not hard candies.
- ✓ Wait the full 2 hours before cutting; I know it’s torture, but it’s necessary!
Creative Variations and Swaps
Sometimes we want to shake things up and add a bit of our own personality to the chocolate chip caramel dessert bars. While the classic version is hard to beat, these little tweaks can make the recipe feel brand new.
| Original Ingredient | Substitute | Why It Works |
|---|---|---|
| Dark Chocolate Chips | Butterscotch Chips | Provides a more intense, "malty" sweetness. Note: Very sweet! |
| Heavy Cream | Full fat Coconut Milk | Adds a subtle tropical note and keeps the caramel creamy. |
| Vanilla Bean Paste | Almond Extract (1 tsp) | Gives a cherry like, nutty aroma that pairs beautifully with caramel. |
If you are looking for something even faster than this classic bake, you might want to try my No Bake Monster Cookie Bars which are perfect for those days when you simply cannot wait for the oven to preheat.
For a bit of extra texture, I love adding half a cup of toasted pecans or walnuts to the dough. The crunch of the nuts against the soft caramel is a match made in heaven. You could also try a "Mexican Hot Chocolate" version by adding half a teaspoon of cinnamon and a tiny pinch of cayenne pepper to the flour mixture.
It provides a back of-the throat warmth that is absolutely addictive when paired with the salted caramel.
How to Store and Keep Fresh
These bars are quite hardy, but because of the dairy in the caramel, you need to be mindful of how you store them. In my house, they rarely last more than 24 hours, but if you have more willpower than we do, here is how to keep them at their best.
Storage: Keep the bars in an airtight container at room temperature for up to 3 days. If your kitchen is very warm, move them to the fridge to prevent the caramel from getting too messy. They actually taste wonderful chilled! In the fridge, they will stay fresh for up to a week.
Freezing: These bars freeze beautifully. Wrap individual squares in plastic wrap and then place them in a freezer safe bag. They will keep for up to 3 months. To eat, simply let them thaw on the counter for about an hour, or give them a 15 second zap in the microwave for that "just out of the oven" gooeyness.
Zero Waste Tip: If you find the edges are a little too crunchy for your liking, don't throw them away! Crumble the over baked edges over vanilla bean ice cream. The salty, chocolatey crumbs make the world's best sundae topping.
You can also pulse the scraps in a food processor and use them as a base for a cheesecake crust.
Pro Presentation and Plating Tips
If you’re serving these at a party or giving them as a gift, a little bit of styling goes a long way. Since these are "bars," the beauty is in the layers.
- The Clean Cut: For those perfectly sharp edges, use a large chef’s knife. Wipe the blade clean with a warm, damp cloth between every single cut. This prevents the caramel from dragging and smearing across the cookie layers.
- The Salt Garnish: Right before serving, add a tiny extra pinch of flaky sea salt. It catches the light and lets your guests know exactly what flavor profile to expect.
- Individual Wrapping: If gifting, wrap each bar in a small square of parchment paper and tie it with a bit of kitchen twine. It looks rustic, professional, and keeps the bars from sticking to each other in a gift box.
Serving these bars slightly warm with a small scoop of cold milk bar style cereal ice cream or a simple dollop of unsweetened whipped cream can turn a humble bar into a five star dessert. The heat from the bar will start to melt the cream, creating a self saucing masterpiece on the plate.
Trust me, your friends will be asking for the recipe before they’ve even finished their first bite.
Right then, you have the science, the steps, and the secrets. It’s time to get that oven preheated and start making your kitchen smell like the best bakery in town. These chocolate chip salted caramel cookie bars are waiting for you, and honestly, you deserve a treat this good. Happy baking!

Recipe FAQs
How to ensure the caramel layer does not leak out during baking?
Whisk in one tablespoon of flour into your caramel and cream mixture. This stabilization creates a thicker consistency that helps the filling stay contained between the dough layers.
Is it necessary to use a metal baking pan for this recipe?
Yes, a metal pan is recommended because it conducts heat more efficiently than glass. This ensures the bottom layer of the cookie bars bakes through properly within the 35-minute cook time.
Can I slice the bars immediately after taking them out of the oven?
No, you must wait at least two hours. The caramel filling needs this cooling time to set; cutting too early will result in a messy, liquid center.
Is it true that I should skip the cornstarch to keep the bars chewier?
No, this is a common misconception. The cornstarch is essential for providing structure and maintaining the perfect tender crumb. If you enjoyed mastering the chewiness here, you will find that same texture building logic applied in other classic cookie recipes.
How to prevent the top layer of dough from browning too quickly?
Cover the pan loosely with aluminum foil if you notice the top browning before the 35-minute mark. This protects the crust while allowing the interior to finish baking thoroughly.
Should I use salted butter instead of unsalted butter?
No, stick to unsalted butter. Since the recipe calls for a specific addition of flaky sea salt, using salted butter makes it difficult to control the final flavor profile.
How to tell if the cookie bars are fully baked?
Look for golden brown edges and a firm top crust. Because the center contains caramel, relying on sensory cues like color and structural firmness is more reliable than a toothpick test.
Salted Caramel Cookie Bars

Ingredients:
Instructions:
Nutrition Facts:
| Calories | 288 kcal |
|---|---|
| Protein | 2.9 g |
| Fat | 14.2 g |
| Carbs | 38.5 g |
| Fiber | 1.2 g |
| Sugar | 27.4 g |
| Sodium | 184 mg |
