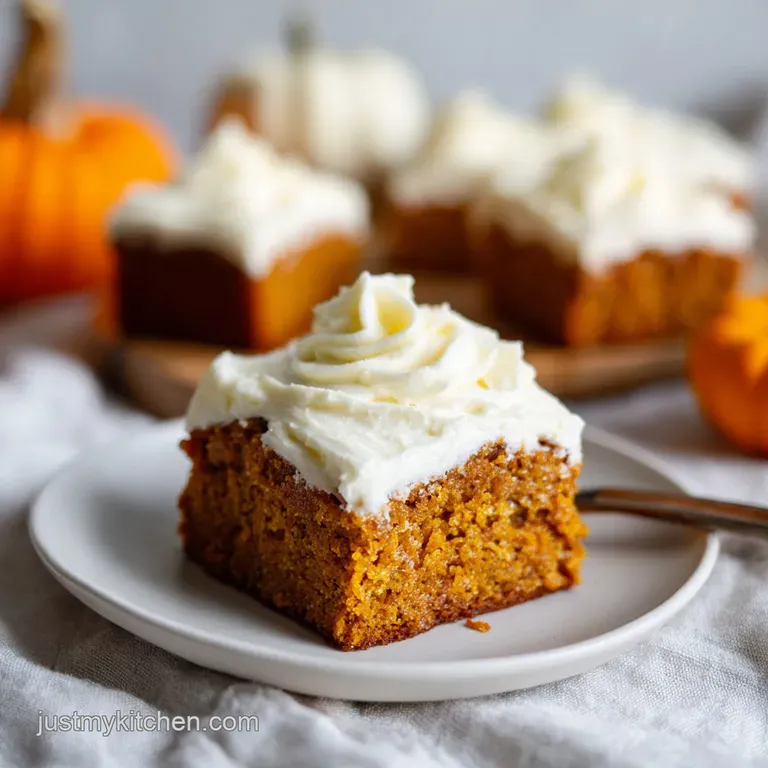
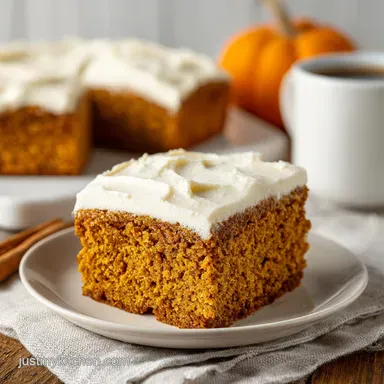
Pumpkin Bars: Moist and Spiced
- Time: Active 15 minutes, Passive 25 minutes, Total 40 minutes
- Flavor/Texture Hook: Silky pumpkin sponge with a pillowy, tangy frosting finish
- Perfect for: Large family gatherings, autumn potlucks, and school bake sales
- The Cultural Heritage of Classic Pumpkin Bars
- Why the Texture Stays So Silky
- Exact Specs for Your Best Batch
- The Alchemy of Spiced Component Selections
- Two Tools for Sheet Pan Success
- Master the Mixing and Baking Process
- Fixing Common Spiced Cake Baking Errors
- Swaps for Every Dietary Kitchen Need
- Storage Hacks for Long Lasting Freshness
- Serving Ideas for Your Fall Party
- Recipe FAQs
- 📝 Recipe Card
The Cultural Heritage of Classic Pumpkin Bars
Long before we were obsessed with seasonal lattes, the humble pumpkin was a survival staple in early American colonies. It wasn't always the star of a sweet treat, though. In those early days, it was often stewed, mashed into savory pottages, or even fermented into ale.
The transition from a hearty vegetable to the base of our favorite fall dessert happened slowly, as sugar became more accessible and the "jelly roll pan" became a kitchen icon in the mid twentieth century.
These Pumpkin Bars represent that evolution, moving from a dense colonial necessity to a light, airy, and whimsical square of joy that defines the modern harvest season.
When I think about these bars, I’m transported back to my grandmother’s kitchen in late October. The air was always thick with the scent of ground cinnamon and the soft hiss of the oven cooling down. She taught me that the secret wasn’t just in the pumpkin itself, but in the patience of the whip.
We’d watch the eggs and sugar turn into a glossy, pale ribbon, a little bit of kitchen magic that felt like a secret spell. It’s a tradition that feels both ancient and entirely modern, a way to celebrate the cooling weather with something that warms you from the inside out.
The beauty of the pumpkin bars from scratch movement is that it honors this history while embracing the convenience of modern techniques. We aren't out in the fields roasting gourds for twelve hours anymore, but we still care about the integrity of the crumb.
This recipe is a nod to those neighborhood potlucks of the 1960s, where a single sheet pan could feed twenty four hungry friends. It’s about sharing, about the velvety texture of a well beaten frosting, and about that first bite where the spice hits the back of your throat and tells you that autumn has finally arrived.
Why the Texture Stays So Silky
Oil Based Emulsion: Unlike butter, which is 15% water and can lead to a tougher crumb if overmixed, vegetable oil provides 100% fat that coats flour proteins to prevent excess gluten development.
Moisture Retention: The high fiber content in the pumpkin puree acts as a natural sponge, locking in hydration and preventing the bars from drying out during the 25 minutes of baking.
Chemical Leavening Balance: Using both baking powder for lift and baking soda to react with the acidity in the pumpkin creates a dual action rise that keeps the bars light rather than gummy.
Sifting Mechanics: Passing the dry ingredients through a fine mesh sieve Aerates the flour, removing clumps and ensuring the spices are distributed evenly for a consistent flavor profile in every square.
| Servings | Ingredient Adjustments | Pan Size | Cook Time |
|---|---|---|---|
| 12 people | Half all ingredients (use 2 eggs) | 9x9 inch square pan | 22-25 minutes |
| 24 people | Use official recipe quantities | 15x10 inch jelly roll | 25 minutes |
| 48 people | Double all ingredients (2 batches) | Two 15x10 pans | 25 minutes (swap racks) |
The table above helps you scale this for anything from a cozy family night to a massive block party. If you are halving the recipe, remember that a smaller pan might result in a slightly thicker bar, so keep a close eye on that toothpick test at the 22 minute mark.
For those big parties, baking two pans at once is a breeze as long as you rotate them halfway through to ensure the heat hits every corner evenly.
Exact Specs for Your Best Batch
| Ingredient | Science Role | Pro Secret |
|---|---|---|
| Pumpkin Puree (15 oz) | Primary moisture and structure | Never use "pie filling" which has stabilizers that ruin the crumb. |
| Large Eggs (4) | Emulsifier and protein binder | Room temperature eggs incorporate 30% more air than cold ones. |
| Vegetable Oil (1 cup) | Fat source for tender crumb | Use a neutral oil like grapeseed to let the pumpkin spice shine. |
| Brown Sugar (2/3 cup) | Hygroscopic sweetener | Pack it tightly to ensure the molasses content keeps the bars fudgy. |
Every component in this easy pumpkin bars recipe has a job to do. The sugar isn't just there for sweetness; it’s actually a liquid ingredient once it hits the oven heat. It dissolves and interferes with the flour’s ability to form long gluten strands, which is exactly why these bars feel so tender on the tongue. If you're looking for another way to use up that fall spice cabinet, my Pumpkin Oatmeal Scotchies use a similar spice profile but with a chewy cookie texture.
The Alchemy of Spiced Component Selections
To create the best pumpkin bars recipe, we need to talk about the quality of your elements. We aren't just tossing things in a bowl; we are building a profile of flavors that should sing.
- Pumpkin Puree (15 oz): The soul of the dish. Look for a brand that is 100% pumpkin. Why this? Provides the specific density and vegetal sweetness needed for the structural integrity of the bar.
- Substitute: Butternut squash puree (similar starch profile but slightly nuttier).
- All Purpose Flour (2 cups): The skeletal structure. Why this? Provides enough protein for a soft lift without the heaviness of whole wheat.
- Substitute: A 1:1 gluten-free baking blend (ensure it contains xanthan gum for elasticity).
- Vegetable Oil (1 cup): The moisture delivery system. Why this? Stays liquid at room temperature, keeping the bars soft for days.
- Substitute: Melted coconut oil (adds a very faint tropical note and slightly firmer texture).
- Granulated Sugar (1 cup): For crisp edges and sweetness. Why this? Helps the eggs whip into a glossy, stable foam.
- Substitute: Cane sugar (slightly more golden color).
- Light Brown Sugar (2/3 cup): For that deep, caramel like undertone. Why this? Adds moisture through molasses which reacts with the baking soda.
- Substitute: Dark brown sugar (brings a more intense, smoky molasses flavor).
- Large Eggs (4): The binding magic. Why this? Creates the emulsion between the oil and the pumpkin puree.
- Substitute: Flax eggs (1 tbsp ground flax + 3 tbsp water per egg; note: the bars will be denser).
- Cinnamon & Pumpkin Pie Spice: The aromatic heart. Why this? Essential for that classic "fall" sensory experience.
- Substitute: A mix of ground ginger, cloves, and nutmeg if you've run out of the blend.
- Cream Cheese (8 oz): The tangy frosting base. Why this? Provides the necessary acid to balance the heavy sugar in the topping.
- Substitute: Mascarpone (richer, less tangy, very velvety).
Using high-quality vanilla extract is one of those tiny details that changes everything. While imitation vanilla works in a pinch, the pure stuff has hundreds of flavor compounds that blossom when they hit the cream cheese. If you find yourself with extra pumpkin after this, you might enjoy making a Pumpkin Pie Crisp which uses many of these same pantry staples but adds a delightful crunch on top.
Two Tools for Sheet Pan Success

You don't need a professional kitchen to make homemade pumpkin bars, but two specific items make the journey much smoother. First is the 15x10-inch jelly roll pan. This specific size is crucial because it dictates the height of your bar.
If you use a standard 13x9 baking dish, your bars will turn into a thick cake, which is fine, but you'll lose that specific "snack bar" ratio of frosting to cake.
Second, a fine mesh sieve is your best friend here. Sifting isn't just about removing lumps; it’s about making sure that the cinnamon and baking soda are perfectly integrated before they ever touch the wet ingredients. This prevents those little "pockets" of bitter soda that can ruin a perfectly good bite.
Chef's Tip: If you don't have a jelly roll pan, use a standard large cookie sheet with at least 1 inch sides. Just be careful not to overfill it; you want about a 1/2 inch of space at the top to allow for the rise!
Master the Mixing and Baking Process
- Preheat your oven to 350°F (175°C) and grease a 15x10-inch jelly roll pan thoroughly. Note: Using a light colored pan prevents the bottom of the bars from browning too quickly.
- In a large bowl, whisk together the pumpkin puree, 4 eggs, 1 cup vegetable oil, 1 cup granulated sugar, and 2/3 cup brown sugar until the mixture looks glossy and smooth.
- Place a fine mesh sieve over the wet ingredients and sift in the 2 cups flour, 2 tsp baking powder, 1 tsp baking soda, 2 tsp cinnamon, 1 tsp pumpkin pie spice, and 1/2 tsp sea salt.
- Gently fold the dry ingredients into the wet using a spatula until just combined and no flour streaks remain. Note: Overmixing here will develop gluten and make the bars tough.
- Spread the batter evenly into the prepared jelly roll pan, using an offset spatula to reach the corners.
- Bake for 25 minutes until a toothpick inserted into the center comes out clean and the edges pull slightly away from the pan.
- Remove from the oven and let the bars cool completely in the pan on a wire rack. Wait until the pan is cold to the touch before frosting.
- For the frosting, beat 8 oz cream cheese and 1/2 cup butter together until pale and completely smooth.
- Gradually add 3 cups powdered sugar, 1.5 tsp vanilla, and 1 tbsp milk, whipping until the texture is light, fluffy, and holds its shape.
- Frost the cooled bars generously with a thick layer and cut into 24 squares.
Fixing Common Spiced Cake Baking Errors
Why Your Bars Are Gummy
This usually happens if the pumpkin puree was too watery or if the bars were pulled out of the oven too early. Pumpkin is dense by nature, so it needs that full 25 minutes to set the internal structure. If the center feels "squishy" rather than springy, they need more time.
Why Your Frosting Is Runny
The biggest culprit here is temperature. If your butter or cream cheese was melted rather than "softened," or if you added the milk too quickly, the emulsion breaks. Also, never frost a warm bar! The residual heat will turn your beautiful cream cheese topping into a sugary soup.
| Problem | Root Cause | Solution |
|---|---|---|
| Sunken Center | Too much leavening or opening oven door too early | Measure baking powder carefully; don't peek until 20 minutes in. |
| Dry/Crumbly Edges | Overbaked or too much flour | Use the "spoon and level" method for flour; check doneness at 23 mins. |
| Grainy Frosting | Un sifted powdered sugar | Always sift your powdered sugar to remove those stubborn tiny lumps. |
But what about the sogginess? We'll get to that. Usually, a soggy bottom comes from storing the bars while they are still slightly warm, which creates condensation. Always ensure they are entirely at room temperature before you even think about putting a lid on the container.
Common Mistakes Checklist
- ✓ Check your baking soda expiration date (old soda leads to flat, dense bars).
- ✓ Use full fat cream cheese for the frosting (low-fat versions lack the structural stability).
- ✓ Avoid over whisking the batter once the flour is added; fold gently with a spatula.
- ✓ Ensure the pumpkin is "puree" and not "pie filling" to keep the sugar levels balanced.
- ✓ Tap the filled pan on the counter 3 times before baking to release trapped air bubbles.
Swaps for Every Dietary Kitchen Need
If you're dealing with allergies or specific diets, these moist pumpkin bars are actually quite forgiving. Because the recipe relies on oil and pumpkin for moisture, you can play around with the flour and fat sources without the whole thing collapsing.
| Original Ingredient | Substitute | Why It Works |
|---|---|---|
| All Purpose Flour | 1:1 gluten-free Flour | The pumpkin provides enough moisture to prevent the GF flour from being "gritty." |
| Vegetable Oil | Applesauce (unsweetened) | Cuts fat significantly. Note: Result will be more cake like and less fudgy. |
| Cream Cheese | Vegan Cream Cheese | Modern plant based versions mimic the tang well. Best when chilled deeply. |
When scaling this recipe down for a small gathering, don't just guess on the pan size. A 9x9 inch square pan is the perfect vessel for a half batch. You’ll want to beat one egg and use about half of it to get the ratio exactly right.
For doubling the recipe, I actually recommend making two separate batches in two separate bowls rather than trying to fit a double load into one mixer. It ensures the leavening is perfectly even.
| Method | Time | Texture | Best For |
|---|---|---|---|
| Standard Sheet Pan | 25 minutes | Thin, classic, snack style | Large crowds/parties |
| 13x9 Baking Dish | 35 minutes | Thick, cake like, fluffy | Dessert with a fork |
| Muffin Tin | 18 minutes | Individual, domed, portable | School lunches |
Storage Hacks for Long Lasting Freshness
Because of the cream cheese frosting, these fall pumpkin bars belong in the fridge. They will stay perfectly moist and delicious for up to 5 days if kept in an airtight container. In fact, many people (including myself!) think they taste even better on day two because the spices have had a chance to marry and the frosting sets into a firmer, more velvety consistency.
For zero waste, if you find yourself with leftover pumpkin puree (since we use a full 15 oz can here, you shouldn't have any, but just in case!), you can stir it into morning oatmeal or freeze it in an ice cube tray for smoothies.
If you have extra frosting, it makes a world class dip for graham crackers or apple slices. To freeze the bars, I recommend freezing them "naked" (without frosting). Wrap the slab in plastic wrap and foil; it will stay fresh for 3 months.
When you're ready to serve, thaw overnight in the fridge and whip up a fresh batch of frosting for that "just baked" look.
Serving Ideas for Your Fall Party
When it comes to presenting these pumpkin bars with cream cheese frosting, simplicity is usually the winner, but a few whimsical touches can turn them into a showstopper. I love to use a hot knife to get those perfectly clean, sharp edges on each square.
Just dip your knife in hot water and wipe it clean between every single cut. It sounds tedious, but the visual result of those crisp orange and white layers is worth every second.
The Salted Caramel Drizzle
For a modern twist, take a jar of salted caramel and give the frosted bars a light, messy drizzle just before serving. The salt cuts through the sweetness of the powdered sugar and highlights the earthy notes of the pumpkin pie spice. It adds a bit of "shatter" to the texture if the caramel is cold.
The Toasted Pecan Crunch
If you don't have nut allergies to worry about, finely chop some toasted pecans and sprinkle them over the top. The contrast between the velvety frosting and the woody, crisp pecans is legendary. You could even fold a half cup of pecans directly into the batter if you want that crunch throughout the bar itself.
Honestly, don't even bother with low-fat nuts; go for the rich, buttery ones for the best experience.
These squares aren't just a dessert; they are a piece of autumn history you can hold in your hand. Whether you're making them for a quiet Sunday afternoon or the biggest party of the year, the combination of spices, moist pumpkin, and tangy cream cheese is a classic for a reason.
Trust me on this: once you've made them from scratch, the store-bought versions will never taste the same again. Let's crack on and get that oven preheated!

Recipe FAQs
What is the secret to good pumpkin bars?
Use the folding technique. Gently fold your flour mixture into the pumpkin base with a spatula until just combined, as over mixing develops too much gluten and makes the bars tough. If you enjoyed perfecting this gentle folding technique, it is the exact same logic we use to maintain a light crumb in our delicious cowboy cookies.
Do pumpkin bars need to be refrigerated overnight?
Yes, they belong in the fridge. Because the frosting is made with cream cheese and butter, refrigeration is necessary for food safety and keeps the texture firm and velvety.
What frosting goes best with pumpkin bars?
Classic cream cheese frosting is the gold standard. The tanginess of the full fat cream cheese perfectly balances the sweet pumpkin and warm cinnamon spices found in the bars.
Do you oil pan for pumpkin bars?
Yes, always grease your 15x10-inch jelly roll pan. A quick swipe of oil or non-stick spray prevents the batter from sticking and ensures you can cut out all 24 uniform squares cleanly.
How to ensure the bars are not dense?
Check your baking soda expiration date before starting. Old baking soda will not react properly with the pumpkin acidity, leading to a flat, dense texture instead of a light, cake like lift.
How to tell when pumpkin bars are fully baked?
Insert a toothpick into the center of the pan. When the toothpick comes out clean after 25 minutes at 350°F, your bars are perfectly set and ready to cool.
Is it true I can use pumpkin pie filling instead of puree?
No, this is a common misconception. You must use 100% pure pumpkin puree, as pre-sweetened pie filling will throw off the sugar ratios and ruin the flavor profile of the recipe.
Homemade Pumpkin Bars
Ingredients:
Instructions:
Nutrition Facts:
| Calories | 316 kcal |
|---|---|
| Protein | 2.8 g |
| Fat | 17.1 g |
| Carbs | 38.7 g |
| Fiber | 1.2 g |
| Sugar | 30.1 g |
| Sodium | 185 mg |
