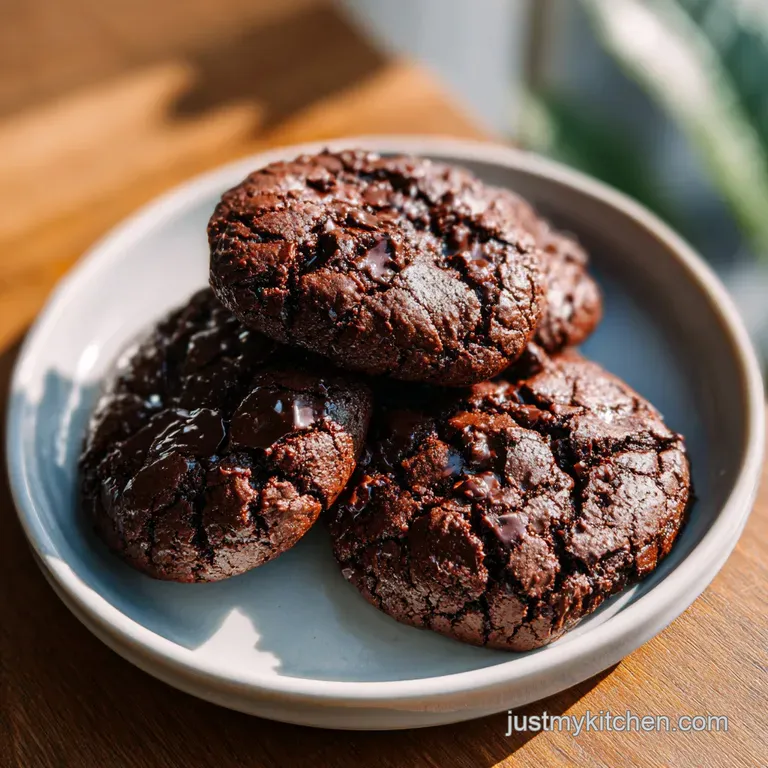
Flourless Chocolate Cookies: Fudgy and Rich
- Time: Active 45 minutes, Passive 10 minutes, Total 55 minutes
- Flavor/Texture Hook: Fudgy, crackling, and intensely chocolatey
- Perfect for: gluten-free guests or late night chocolate cravings
- Baking the Best Flourless Chocolate Cookies
- Key Times and Serving Sizes
- The Ingredients That Create Magic
- Tools for a Flawless Batch
- How to Bake These Fudgy Treats
- Solving Your Cookie Baking Hurdles
- Flavor Ideas for Every Occasion
- Storing and Keeping Cookies Fresh
- What to Serve with Your Cookies
- Recipe FAQs
- 📝 Recipe Card
Baking the Best Flourless Chocolate Cookies
Imagine walking into a kitchen where the air is heavy with the scent of toasted walnuts and the deep, earthy perfume of dark cocoa powder. It is a rainy Tuesday afternoon, the kind of day that begs for a warm oven and a glass of cold milk. I remember the first time I pulled a tray of these out of the oven.
I was hosting a small get together for a friend who recently went gluten-free, and I was terrified that "flourless" would mean "flavorless." Instead, as the oven door creaked open, a cloud of rich chocolate aroma billowed out, promising something far more magical than a standard cookie.
The kitchen was quiet, save for the rhythmic pitter patter of rain against the windowpane, but the sensory experience was loud. These cookies don't just sit there, they demand your attention with their shiny, shattered tops that look like a frozen lake of dark chocolate.
When you take that first bite, there is an audible snap of the outer crust followed immediately by a velvety, molten center that feels like a cross between a truffle and a fudge brownie. It is the kind of recipe that makes you look at your pantry staples with newfound respect.
We often think we need fancy ingredients to make something spectacular, but this recipe proves that technique and patience are the real heroes. The way the egg whites transform from clear liquid into a glossy, heavy batter is nothing short of a kitchen miracle.
It is approachable, traditional in its simplicity, but modern in its dietary flexibility. You don't need to be a professional pastry chef to master this, you just need a whisk, a bowl, and a little bit of love for the craft of baking.
Key Times and Serving Sizes
Understanding the physics of how these cookies set is half the battle. Because we aren't using flour as a structural "skeleton," we rely on the evaporation of moisture and the setting of proteins. This is why the resting time isn't just a suggestion, it's a mandatory appointment for your batter.
Without that rest, you'll lose the iconic crackle that makes these cookies look so sophisticated.
Protein Structure: Egg whites provide the "lift" and "web" that holds the sugar and cocoa together. As they bake, the proteins coagulate, trapping air and creating a light yet chewy interior.
Sugar Saturation: The high ratio of confectioners' sugar is what creates that thin, meringue like crust on top. As the cookies sit during the 30 minutes rest, a skin forms, which then shatters beautifully as the interior expands in the heat.
Cocoa Suspension: Dutch processed cocoa powder doesn't just add flavor, it acts as the "bulk" of the cookie. It absorbs the moisture from the egg whites, creating a stable, scoopable dough that doesn't spread into a puddle.
| Baking Method | Active Time | Resulting Texture | Best For |
|---|---|---|---|
| Immediate Bake | 5 minutes | Flat, thin, chewy | Crispy edges |
| 30 Minute Rest | 35 minutes | Thick, fudgy, cracked | Classic look |
| Chilled Batter | 60 minutes | Dense, truffle like | Ultra rich dessert |
Giving the batter time to breathe at room temperature allows the sugar to fully hydrate. If you skip this, the moisture in the egg whites will turn to steam too quickly in the oven, causing the cookies to puff up and then collapse into a wrinkled mess rather than a beautiful mosaic.
The Ingredients That Create Magic
Choosing the right components is where the whimsy meets the science. For these Flourless Chocolate Cookies, the quality of your cocoa powder is the absolute North Star. Since there is no flour to hide behind, every note of the chocolate will be front and center.
I always reach for a Dutch processed variety because it is darker, smoother, and less acidic than natural cocoa powder, giving the cookies a sophisticated, midnight black hue.
| Ingredient | Science Role | Pro Secret |
|---|---|---|
| Egg Whites | Structural Binder | Use room temperature whites for better volume |
| Confectioners' Sugar | Surface Crackle | Sift twice to ensure a silky, lump free batter |
| Dutch Cocoa | Flavor and Bulk | Toast the powder for 2 mins to deepen the aroma |
The vanilla extract acts as a flavor megaphone, amplifying the chocolate notes while the fine sea salt cuts through the intense sweetness of the powdered sugar. If you are curious about other chocolate adventures, you might find my Chocolate Zucchini Brownies equally fascinating for their hidden moisture. The walnuts add a much needed crunch, providing a sensory contrast to the fudgy base that keeps every bite interesting.
Tools for a Flawless Batch
- Fine Mesh Sieve: Essential for removing the stubborn lumps in powdered sugar and cocoa.
- Glass Mixing Bowl: Better than plastic for egg whites as it doesn't retain oils that can deflate the batter.
- Silicone Spatula: Perfect for folding the inclusions without over beating the delicate egg proteins.
- Parchment Paper: Non negotiable! These cookies are incredibly sticky and will bond to a naked baking sheet like superglue.
- Cookie Scoop: A 1 tablespoon scoop ensures every cookie is uniform, which leads to even baking across the tray.
When you use a glass bowl, you can actually see the "pale mahogany" color developing as you whisk the dry ingredients. It's a visual cue that you've achieved a perfect blend. Using a metal whisk is fine for the dry stage, but once those egg whites go in, you want to switch to the spatula to gently encourage the marriage of wet and dry.
How to Bake These Fudgy Treats

- Sift 3 cups (360g) Confectioners' sugar, 0.75 cup (65g) cocoa powder, and 0.5 tsp sea salt into your bowl. Note: Sifting is the only way to avoid biting into a chalky pocket of dry sugar.
- Whisk the dry ingredients together until the mixture reaches a uniform, pale mahogany color.
- Add 2 large room temperature egg whites and 1 tbsp vanilla extract. Note: Room temp whites incorporate much faster than cold ones.
- Fold slowly with a spatula until a thick, glossy, heavy batter forms and no white streaks remain.
- Fold in 1 cup (170g) chocolate chips and 0.5 cup (60g) toasted walnuts until evenly distributed.
- Line baking sheets with parchment. Scoop tablespoon sized mounds 2 inches apart.
- Let the mounds rest at room temperature for 30 minutes until a dull skin forms on the surface.
- Preheat oven to 350°F (175°C).
- Bake for 10 minutes until the tops are shiny and cracked.
- Cool completely on the sheet until the fudgy center is firm enough to lift.
The aroma of these baking is truly something to behold. Around the 7 minute mark, the scent of the toasted walnuts will start to mingle with the warming chocolate, signaling that the magic is nearly complete. Don't be tempted to pull them early; that final minute is when the crackles really define themselves.
Solving Your Cookie Baking Hurdles
Why Your Cookies Are Flat
If your cookies look like pancakes, it usually means the egg whites were too cold or the batter wasn't thick enough. The batter should feel like heavy lava, not a runny syrup. Another culprit is skipping the sifting step, which prevents the sugar from fully integrating with the cocoa, leading to a weak structure that collapses under the heat of the oven.
The Batter Is Too Runny
Sometimes, despite our best efforts, the environment plays a role. High humidity can make your powdered sugar "weep," resulting in a looser batter. If this happens, don't panic. You can add another tablespoon of cocoa powder to tighten things up. If you're looking for a more stable base next time, check out my Cookies in 25 Minutes recipe for a more traditional dough structure.
| Problem | Root Cause | Solution |
|---|---|---|
| No Crackle | Didn't rest batter | Wait 30 mins before baking |
| Sticky Bottoms | Undercooked | Bake 1-2 mins longer until firm |
| Too Sweet | Poor salt balance | Increase sea salt to 0.75 tsp |
- ✓ Always use "large" eggs; jumbo eggs add too much liquid.
- ✓ Ensure your walnuts are toasted before adding to the batter.
- ✓ Never grease the parchment paper; the cookies need to grip to rise.
- ✓ Check your oven temp with a thermometer to ensure a true 350°F.
- ✓ Don't over mix once the chips are in; it can deflate the air.
Flavor Ideas for Every Occasion
While the classic version is hard to beat, I love playing with the "modern" side of this traditional treat. If you want a "Mexican Hot Chocolate" vibe, add a teaspoon of cinnamon and a pinch of cayenne pepper to the dry mix. The heat from the pepper dances beautifully with the sweetness of the chocolate.
For a more sophisticated evening party, try the "Salted Espresso" version by adding 1 tablespoon of instant espresso powder.
| Ingredient | Substitute | Why It Works |
|---|---|---|
| Walnuts | Pecans | Similar fat content but adds a sweeter, buttery note |
| Sea Salt | Flaky Maldon | Provides a stronger "crunch" of salt on the tongue |
| Vanilla | Almond Extract | Note: Very strong; use only 0.5 tsp for a cherry like finish |
For those looking for a different kind of texture, replacing the chocolate chips with white chocolate chunks creates a "stardust" effect against the dark batter. It is whimsical, approachable, and honestly, a bit of a showstopper at cookie exchanges.
Storing and Keeping Cookies Fresh
These Flourless Chocolate Cookies are remarkably resilient because they don't have flour to go stale. Store them in an airtight container at room temperature for up to 4 days. If you find they've softened too much, a quick 30 second stint in a warm oven will bring back that "shatter" on the top.
They also freeze beautifully! Place them in a single layer on a tray to freeze solid, then transfer to a bag for up to 3 months.
Zero waste tip: If you have leftover egg yolks from this recipe, don't toss them! Use them to make a rich lemon curd or a batch of homemade vanilla pudding. You can even stir them into a carbonara for a decadent dinner. The goal is to use every bit of the magic we bring into our kitchens. If you're into grain free baking, you might also enjoy experimenting with my flourless oat chia bread for a savory change of pace.
What to Serve with Your Cookies
These are intensely rich, so they benefit from a partner that offers some acidity or a clean palate cleanse. A glass of ice cold almond milk or a bold cup of black coffee is the traditional choice.
However, if you're serving these at a dinner party, a small bowl of tart raspberry coulis on the side can cut through the fudge and make the whole experience feel like a restaurant dessert.
For a whimsical summer twist, crumble a few of these over a scoop of sea salt caramel gelato. The shattered bits of the cookie top add a texture that is simply unmatched by store-bought toppings. It turns a simple bowl of ice cream into an event.
No matter how you serve them, remember that the best ingredient in any kitchen is the joy of sharing something you made with your own two hands.
The Myth of Searing Sugar
Many people believe that the high heat "sears" the sugar to create the crust. In reality, it is the dehydration of the surface during the resting phase that creates the skin. The oven heat then expands the moist interior, causing that pre dried skin to crack. It is a game of moisture management, not just raw heat.
The Egg White Whipping Fallacy
You might think you need to whip the egg whites to stiff peaks like a meringue. While that would create a cookie, it would be much airier and more like a traditional macaron. By simply folding the unbeaten whites into the sugar, we create a much denser, fudgier, and more brownie like consistency that is the hallmark of this particular recipe.
| Fresh vs. Shortcut | Homemade Flourless | Boxed Brownie Mix |
|---|---|---|
| Texture | Shatter crisp top | Soft and cakey |
| Ingredient Control | No preservatives | High sugar/oil content |
| Flavor Depth | Pure cocoa intensity | Often muted/artificial |
If you want a Chewier cookie, use natural cocoa powder instead of Dutch processed. If you want a Darker cookie, use a high fat cocoa powder (above 20% cocoa butter). If you want a Nut Free version, swap the walnuts for toasted sunflower seeds or extra chocolate chips.

Recipe FAQs
Is it true I must use flour to get the right structure?
No, this is a common misconception. The combination of powdered sugar and egg whites creates a stable, glossy base that mimics a meringue, eliminating the need for flour entirely.
How to ensure the cookies get that signature crackle top?
Rest the scooped batter at room temperature for 30 minutes before baking. This rest period allows the surface of the dough to dry slightly, ensuring it cracks beautifully as it expands in the 350°F oven.
How to keep the batter from becoming grainy?
Sift the powdered sugar and cocoa powder through a fine mesh sieve into your bowl. Removing clumps during this initial step is the best way to ensure a smooth, uniform texture in your final batter.
How to tell when the cookies are finished baking?
Remove them from the oven once the tops appear shiny and cracked. Since these bake for only 10 minutes at 350°F, watch for that visual cue rather than relying solely on the clock, then let them cool completely on the baking sheet to set the fudgy interior.
How to store these cookies for the best texture?
Keep them in an airtight container at room temperature for up to 4 days. If they lose their crisp exterior, a 30-second stint in a warm oven will restore that distinct "shatter" on the top.
Can I freeze the cookies for later?
Yes, they freeze beautifully for up to 3 months. Freeze them in a single layer on a tray first, then transfer them to a freezer safe bag to prevent sticking.
Is there a way to use the leftover egg yolks?
Yes, save your yolks for other rich applications like homemade lemon curd. If you enjoyed the fudgy texture here, you can apply similar ingredient balancing techniques when experimenting with other chocolate based desserts.
Flourless Chocolate Cookies
Ingredients:
Instructions:
Nutrition Facts:
| Calories | 157 kcal |
|---|---|
| Protein | 2.1 g |
| Fat | 5.5 g |
| Carbs | 28.7 g |
| Fiber | 1.4 g |
| Sugar | 25.2 g |
| Sodium | 110 mg |
