Fudgy Chocolate Kiss Cookies Recipe
- Time: Active 15 minutes, Passive 10 minutes, Total 25 minutes
- Flavor/Texture Hook: Fudgy, cocoa rich crumb with a melting chocolate core
- Perfect for: Holiday gift tins or whimsical afternoon tea treats
- Why These Chocolate Kiss Cookies Are Pure Magic
- Kitchen Specs for Your Bake
- Selecting Your Magic Cocoa Components
- Essential Tools for Cookie Success
- The Step by Step Process
- Avoiding Common Cookie Disasters
- Creative Variations for Your Cookies
- Preservation Secrets for Fresh Cookies
- Serving Your Sweet Chocolate Treats
- Scaling for Any Occasion
- Recipe FAQs
- 📝 Recipe Card
Why These Chocolate Kiss Cookies Are Pure Magic
Imagine the kitchen filling with the scent of toasted cocoa and warming butter while the oven hums in the background. There is something truly enchanting about the moment you unwrap a foil wrapped chocolate, the crinkle of the silver paper signaling that the bake is almost complete.
I remember the first time I made these, I was so worried the chocolate would just slide off the top, but there is a specific rhythm to the "press" that makes them look like tiny, edible stars.
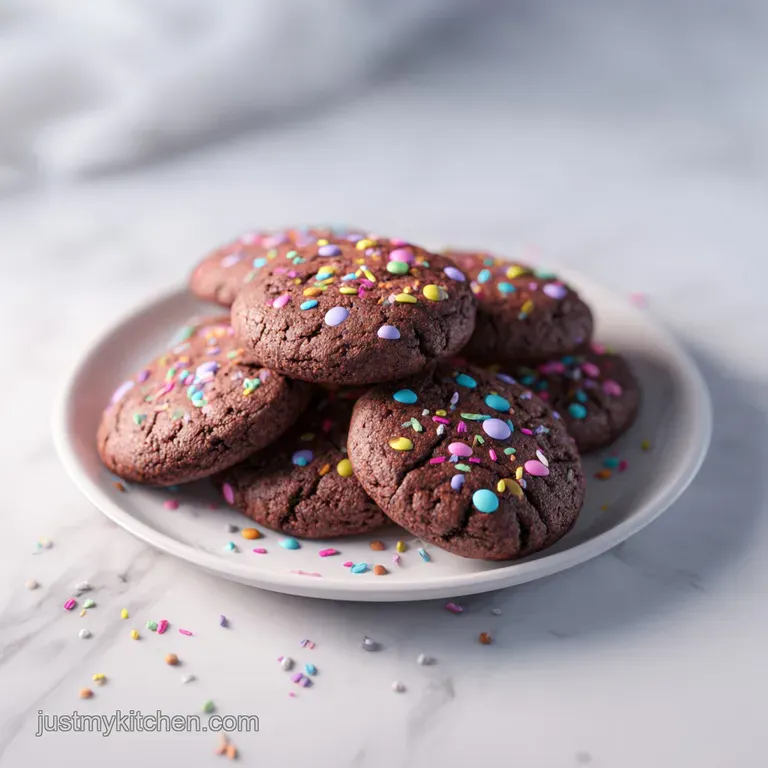
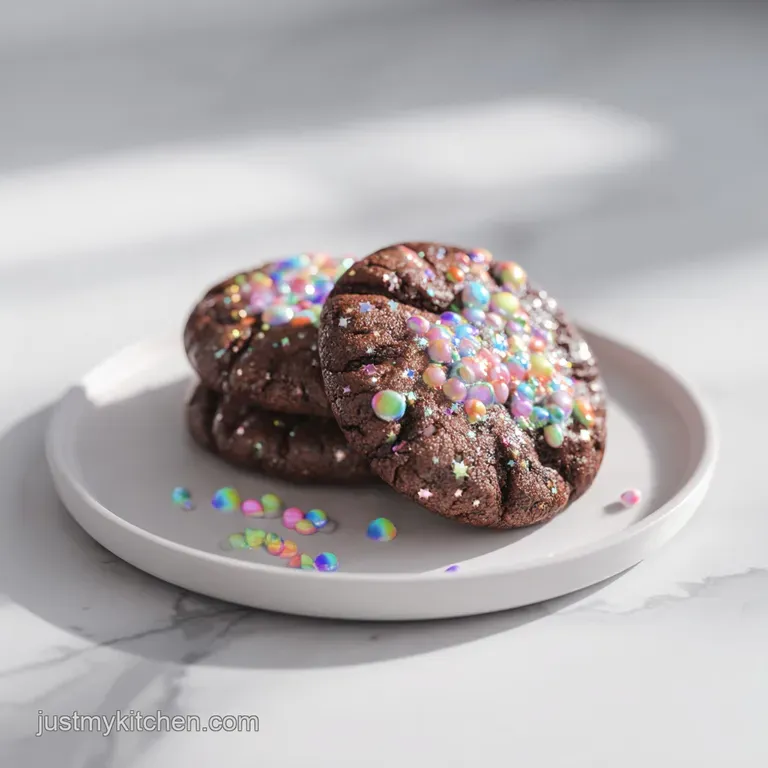
This particular version moves away from the traditional peanut butter base, focusing instead on a double chocolate experience that feels a bit more sophisticated. The dough is thick and dark, rolling into sugar dusted spheres that sparkle like frost under the kitchen lights.
When you press that chocolate into the center, the cookie sighs and cracks just slightly at the edges, creating those signature craters we all love.
It’s the kind of baking that doesn’t require a massive time commitment but offers a huge sensory reward. You get the crunch of the granulated sugar coating, the soft give of the chocolate cookie, and then the velvety melt of the center.
It’s a texture journey that keeps you coming back for just one more, especially when they are still slightly warm from the tray.
The Science of the Bloom
Alkalization Impact: Using Dutch process cocoa neutralizes natural acidity, allowing the chocolate flavor to "bloom" more intensely without a bitter aftertaste. This process also darkens the dough to a deep charcoal hue, providing a striking contrast against the white sugar crystals.
| Thickness | Internal Temp | Rest Time | Visual Cue |
|---|---|---|---|
| 1 inch ball | 175°F (80°C) | 5 mins | Edges set, center slightly soft |
| 1.5 inch ball | 180°F (82°C) | 8 mins | Tiny cracks appearing on surface |
| 2 inch ball | 185°F (85°C) | 10 mins | Deep fissures and matte finish |
The timing of the "press" is the most critical part of the physics here. If you add the chocolate too early, the residual heat from the oven will collapse the structure of the kiss.
Waiting exactly two minutes allows the cookie to firm up enough to support the weight of the chocolate while still being soft enough to create a lasting bond.
Kitchen Specs for Your Bake
Structural Integrity: The light brown sugar contains molasses, which adds moisture and creates a flexible crumb that won't shatter when you press the chocolate down.
| Ingredient | Science Role | Pro Secret |
|---|---|---|
| Unsalted Butter | Fat medium | Use softened (65°F) for maximum aeration without greasy leakage |
| Dutch process Cocoa | pH neutralizer | Sift before adding to prevent stubborn cocoa lumps in the dough |
| Light Brown Sugar | Hygroscopic agent | Pack it tightly to ensure consistent moisture levels in every batch |
When you are looking for that specific "shatter" on the outside and fudge on the inside, the sugar ratio matters immensely. We use a blend to ensure the edges get that slight crispness while the heart of the cookie stays tender. This is quite similar to the balance I look for in my Chocolate Zucchini Bread recipe, where moisture is king.
Selecting Your Magic Cocoa Components
- 1/2 cup (113g) unsalted butter, softened: Why this? Provides the fat base for a melt in-the mouth texture.
- Substitute: Salted butter (reduce added salt by half).
- 1/2 cup (100g) light brown sugar, packed: Why this? Adds chewiness and a hint of caramel notes.
- Substitute: Dark brown sugar for a deeper, more intense molasses flavor.
- 1/4 cup (50g) granulated sugar: Why this? Helps the edges crisp and stabilizes the air bubbles.
- Substitute: Caster sugar for a finer, more delicate crumb.
- 1 large egg, room temperature: Why this? Binds the fats and dry ingredients into a cohesive dough.
- Substitute: 1/4 cup unsweetened applesauce (results in a slightly denser cookie).
- 1 tsp vanilla extract: Why this? Acts as a flavor enhancer for the cocoa compounds.
- Substitute: Almond extract for a nutty, cherry like aromatic twist.
- 1 1/3 cups (165g) all purpose flour: Why this? The skeletal structure that holds the cookie's shape.
- Substitute: 1:1 gluten-free flour blend with xanthan gum.
- 1/2 cup (45g) Dutch process cocoa powder: Why this? Gives that deep, dark color and smooth chocolate profile.
- Substitute: Natural cocoa powder (add 1/4 tsp extra baking soda).
- 1/2 tsp baking soda: Why this? Reacts with the sugars to create a light lift.
- Substitute: 1.5 tsp baking powder (will result in a puffier cookie).
- 1/4 tsp salt: Why this? Cuts through the sweetness and balances the chocolate.
- Substitute: Sea salt flakes for a more textural salt hit.
- 1/3 cup granulated sugar, for coating: Why this? Creates the signature sparkling, crunchy exterior.
- Substitute: Coarse sanding sugar for extra sparkle and crunch.
- 24 Hershey’s Kisses, wrappers removed: Why this? The iconic center that melts into a soft ganache like state.
- Substitute: Dark chocolate chunks or large chocolate chips.
Essential Tools for Cookie Success
You don't need a lab full of gadgets to make these, but a few specific items make the process much smoother. I highly recommend a small cookie scoop (about 1 tablespoon size). It ensures every single one of your Chocolate Kiss Cookies is the exact same size, which means they all finish baking at the exact same moment.
No one wants a tray where half are charred and half are raw!
A sturdy stand mixer or a reliable hand mixer is your best friend here. You want to cream that butter and sugar until it looks like pale, fluffy clouds. This aeration is what keeps the cookies from becoming hard little pucks. Also, grab some parchment paper or a silicone baking mat.
The sugar coating on these cookies loves to caramelize and stick to metal pans, and a non stick surface makes cleanup a dream.
Chef Tip: Freeze your chocolate kisses for 15 minutes before unwrapping. This prevents your warm fingers from smudging the points while you press them into the hot dough.
The step-by-step Process
Prepping the Base
Preheat your oven to 350°F (180°C). Line two large baking sheets with parchment paper. In a medium bowl, whisk together your flour, cocoa powder, baking soda, and salt.
Sifting the cocoa here is non negotiable because those tiny lumps of powder are surprisingly resilient and can leave bitter pockets in your finished bake.
For the Double Chocolate Dough
Cream the softened butter, brown sugar, and 1/4 cup granulated sugar in your mixer for about 3 minutes. Beat until the mixture looks pale and increased in volume. Add the egg and vanilla extract, beating again until the mixture is silky and fully combined.
Shaping the Dough
Turn your mixer to low and slowly add the dry ingredients. Mix only until no white streaks of flour remain. Over mixing at this stage develops too much gluten, which will turn your tender treats into bread like rounds.
Scoop rounded tablespoons of dough and roll them between your palms into 1 inch spheres.
The Sugar Coating
Place the 1/3 cup of granulated sugar in a shallow bowl. Roll each dough ball in the sugar until it is completely encrusted. This layer is what gives the cookie its characteristic sparkle and prevents the dough from sticking to your hands during the final shaping.
Baking and Pressing
Space the balls 2 inches apart on your prepared sheets. Bake for 10 minutes until the surfaces have just begun to crack and the edges feel set to the touch. While they bake, unwrap your chocolate kisses.
Remove the cookies from the oven and let them sit for exactly 2 minutes.
The Final Touch
Gently but firmly press a chocolate kiss into the center of each warm cookie. Press until the edges of the cookie crack slightly. The heat from the cookie will soften the bottom of the chocolate, creating a permanent bond as it cools.
Allow them to cool completely on the pan so the chocolate can re set.
Avoiding Common Cookie Disasters
One of the most frequent mishaps involves the chocolate melting into a puddle. This usually happens if you press the kisses in the second the tray leaves the oven. The cookies are still radiating intense heat at that point.
By waiting those few minutes, you allow the internal temperature to drop just enough to soften the chocolate without destroying its iconic shape.
Preventing Flattened Disks
If your cookies are spreading into thin pancakes, your butter was likely too warm. Butter should be soft enough to dent with a finger but still feel cool to the touch. If you suspect your kitchen is too hot, pop the rolled dough balls into the fridge for 20 minutes before baking to firm up the fats.
Fixing Dry Dough
Sometimes the dough can feel crumbly or dry, making it hard to roll. This often happens if the flour was measured by volume rather than weight. If it’s too dry, add a teaspoon of milk or water at a time until it comes together. It should feel like soft play dough, not sandy or sticky.
| Problem | Root Cause | Solution |
|---|---|---|
| Cookies are rock hard | Overbaked or too much flour | Reduce bake time by 2 mins; use a scale for flour |
| Chocolate falls off | Pressed into cold cookies | Press immediately after the 2 minute rest period |
| No cracks on top | Dough was too wet | Add 1-2 tbsp flour to the remaining dough |
Common Mistakes Checklist
- ✓ Never skip sifting the cocoa powder; lumps will not disappear during baking.
- ✓ Use room temperature eggs to ensure the emulsion with the butter stays stable.
- ✓ Wait exactly 2 minutes before pressing the chocolate to keep the "kiss" shape.
- ✓ Don't over grease your pans; use parchment paper for the best rise.
- ✓ Ensure your baking soda is fresh by testing a pinch in vinegar.
Creative Variations for Your Cookies
If you want to stray from the classic path, there are plenty of ways to mix things up. For a holiday vibe, try the "Peppermint Twist." Add 1/2 teaspoon of peppermint extract to the dough and use the candy cane striped kisses instead of the plain chocolate ones.
The contrast of the dark dough and the red and white stripes is stunning.
For another bright option, you might consider the techniques used in a Heavenly Lemon Cake recipe to see how citrus can change the profile of a simple cookie base. Adding a bit of orange zest to the chocolate dough creates a "Terry's Chocolate Orange" effect that is incredibly nostalgic.
Trying Peppermint Variations
You can also roll the dough in crushed candy canes instead of granulated sugar. This adds a sharp, refreshing crunch that cuts through the richness of the Dutch process cocoa. Just be sure to crush the candy very finely so it doesn't melt into a sticky mess in the oven.
Making Them gluten-free
These adapt beautifully to gluten-free flour blends. Since there isn't a lot of liquid in the recipe, the lack of gluten doesn't affect the structure too much. Just ensure your blend contains xanthan gum, which provides the "stretch" needed to prevent the cookie from crumbling when you press the chocolate in.
| Original Ingredient | Substitute | Why It Works |
|---|---|---|
| All Purpose Flour | Cup4Cup GF Blend | Maintains structural integrity. Note: May need 5 mins extra rest |
| Hershey's Kisses | Dark Chocolate Truffles | Creates a more decadent, melting center for adults |
| Light Brown Sugar | Coconut Sugar | Adds a toasted, nutty depth. Note: Cookies will be slightly drier |
Preservation Secrets for Fresh Cookies
Storing these cookies requires a bit of care because of the chocolate center. Once they are completely cool and I mean completely, which can take 2 hours place them in an airtight container.
If the chocolate is still soft and you stack them, you’ll end up with a messy, stuck together pile of cocoa.
Storage Guidelines
Keep them at room temperature for up to 5 days. I actually think they taste better on day two when the flavors have had time to settle and the moisture has redistributed. If you live in a very warm climate, you might want to keep them in a cool pantry to prevent the chocolate centers from softening too much.
Freezing and Zero Waste
You can freeze the baked cookies for up to 3 months. To prevent the chocolate from blooming (that white chalky look), wrap the container in a layer of foil before placing it in the freezer. If you have leftover cocoa powder or broken chocolate kisses, don't toss them!
Toss them into your next batch of brownies or use the cocoa to make a quick chocolate syrup for coffee.
Serving Your Sweet Chocolate Treats
These are the ultimate crowd pleasers. Serve them on a vintage platter for a touch of whimsy, perhaps alongside a cold glass of milk or a strong espresso. The bitterness of the coffee brings out the earthy notes in the Dutch process cocoa, making for a very "grown up" snack.
If you are looking for other cookies to fill out a platter, a classic Snickerdoodles recipe provides a lovely cinnamon contrast to the deep chocolate here. They look beautiful side-by-side, one sparkling with cinnamon sugar and the other with deep cocoa and that iconic chocolate peak.
Mastering the Thermal Bond
When you serve them, the chocolate should be firm but yield easily to a bite. If you've followed the "2 minute rule," the bottom of the kiss will have fused with the cookie, making it a singular, cohesive treat. It’s that little bit of kitchen magic that makes these a staple in my home.
The Maillard Reaction Truth
Many people think the sugar coating is just for decoration, but it actually helps with the Maillard reaction on the surface. The sugar crystals provide more surface area for browning, which creates a complex, toasted flavor that you wouldn't get with a plain dough ball.
It’s not just about the sparkle; it’s about the science of taste!
Scaling for Any Occasion
Downsizing for Two
If you only need a small batch, this recipe halves very easily. Since it calls for one egg, simply whisk the egg in a small bowl and use 2 tablespoons of the liquid. Use a toaster oven if you have one, but keep a close eye on the heat as they tend to run hotter than standard ovens.
Doubling for Crowds
When doubling the recipe for a party or bake sale, I recommend only increasing the spices and salt to 1.5 times the original amount to avoid an overpowering flavor. Work in batches when it comes to the baking don't try to crowd three sheets into the oven at once, as it disrupts the airflow and can lead to uneven cooking.
Baking for the Freezer
If you want to bake ahead, the best method is to freeze the dough balls after rolling them in sugar but before baking. When you're ready for a treat, you can bake them directly from frozen; just add 2 minutes to the total bake time.
It’s the perfect way to have fresh, warm cookies whenever the craving hits.

Recipe FAQs
When to put chocolate kisses on cookies?
Wait exactly two minutes after removing cookies from the oven. This short rest allows the cookie structure to set just enough to support the weight of the kiss without collapsing. If you press them in immediately, the intense heat will melt the chocolate into a puddle.
Do Hershey Kisses still exist?
Yes, Hershey Kisses are still widely available. They remain a core product for The Hershey Company, though they frequently release seasonal colors or special flavor variations alongside the classic milk chocolate version.
What is Taylor Swift's cookie recipe?
This recipe is not Taylor Swift's specific widely publicized version, which typically uses peanut butter. Her famous recipe uses creamy peanut butter in the dough base. If you are looking for a healthier, fudgier chocolate alternative, explore our Avocado Brownies Ready recipe, which shares a commitment to intense chocolate flavor.
Are Hershey Kisses different than Hershey Bars?
Yes, they have different compositions and textures. Kisses are designed to be thicker and melt slower, often having a slightly different fat content or a higher percentage of cocoa solids relative to their size compared to a standard bar.
How to prevent the chocolate kiss from melting completely?
Ensure the dough balls are properly chilled and baked until the edges are visibly set. If you struggle with dough spreading too much, it means your fat was too warm; this technique of firming the dough helps maintain structure, similar to the initial chilling steps required for successful shortbread bases, like in our Moist and Grain Free recipe.
Why are my cookies spreading flat before I can add the kiss?
Your butter was too soft, or you over creamed the sugar and butter. Creaming incorporates air; if the butter is too warm, that air escapes too quickly during baking, causing rapid spread. Chill the scooped dough balls for 15 minutes before baking to solidify the fats.
Can I use natural cocoa powder instead of Dutch process?
No, substitution will significantly alter the cookie structure and color. Dutch process cocoa is pH neutral, which works perfectly with baking soda to create the required lift and dark color for this fudgy texture.
Chocolate Kiss Cookies Recipe

Ingredients:
Instructions:
Nutrition Facts:
| Calories | 124 kcal |
|---|---|
| Protein | 1.6 g |
| Fat | 5.7 g |
| Carbs | 17.7 g |
| Fiber | 0.6 g |
| Sugar | 12.2 g |
| Sodium | 41 mg |
