Ricotta Stuffed Chicken Rolls: Velvety Cheese Center
- Time: Active 15 minutes, Passive 15 minutes, Total 30 minutes
- Flavor/Texture Hook: Golden brown seared exterior with a velvety, herb flecked cheese center.
- Perfect for: Quick family dinners or a protein packed meal prep option.
- Juicy Ricotta Stuffed Chicken Rolls
- Why This Method Succeeds
- Essential Component Breakdown
- Ingredients and Smarter Swaps
- Minimal Tools for Success
- Simple Step-by-Step Guide
- Fixing Common Cooking Hurdles
- Flavor Variations and Adjustments
- Scaling for Larger Groups
- Storage and Scrappy Ideas
- Perfect Side Dish Pairings
- Recipe FAQs
- 📝 Recipe Card
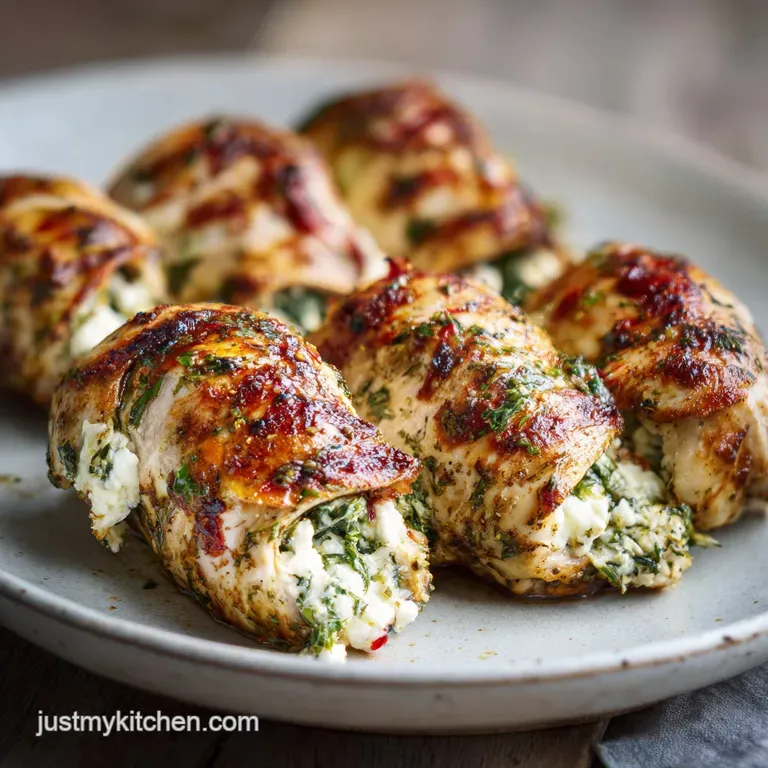
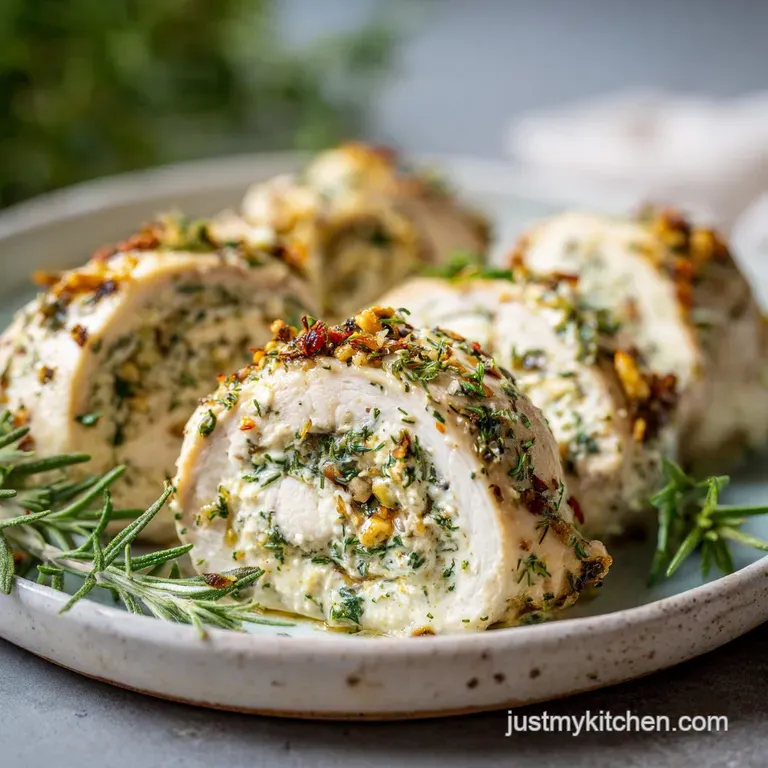
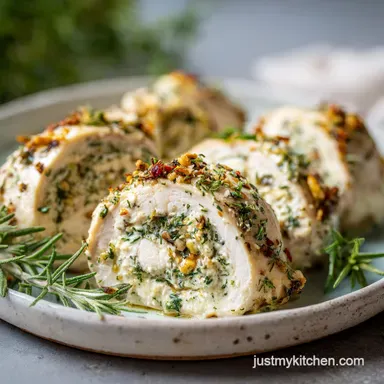
Juicy Ricotta Stuffed Chicken Rolls
I still remember the first time I tried making these. I was terrified the filling would just liquefy and leave me with a hollow piece of dry meat and a very messy pan. I stood over the stove, watching that first roll hit the shimmering oil, holding my breath until I heard that satisfying sizzle.
The aroma of fresh thyme and sizzling butter filled my kitchen, and suddenly, it didn't feel like a risky experiment anymore. When I finally sliced into one, the ricotta stayed right where it was supposed to, creamy and bright with a hint of lemon.
It’s one of those meals that looks like you spent hours in the kitchen, but we both know it was actually quite fast.
We are going to skip the heavy breading and focus on a solid sear. This keeps the prep time down and lets the flavor of the herbed ricotta really shine. Trust me, once you master the "tuck and roll" move, you'll be making this on repeat every single week.
Why This Method Succeeds
Developing the right texture depends on a few simple physical reactions happening in your skillet. We aren't just cooking meat, we are managing moisture and heat transfer to ensure the center is hot while the outside stays tender.
- The Binder Effect: Adding a single egg yolk to the ricotta acts as a thermal stabilizer, thickening the cheese as it heats so it doesn't run out of the chicken.
- Maillard Mastery: Searing the chicken in a mix of oil and butter creates a complex crust that provides a savory contrast to the milky filling.
- Moisture Barrier: Chopped spinach and herbs within the cheese create a textured matrix that holds onto steam, keeping the breast meat from drying out.
| Thickness | Internal Temp | Rest Time | Visual Cue |
|---|---|---|---|
| 1/4 inch (pounded) | 165°F (74°C) | 5 minutes | Juices run clear |
| 1/2 inch (thick) | 165°F (74°C) | 8 minutes | Center is opaque white |
Giving the meat a few minutes to rest after cooking is vital. If you cut into it immediately, the hot juices will rush out, and your velvety filling will lose its structure. It’s similar to the resting technique used in my Mushroom Asiago Chicken recipe to keep everything juicy.
Essential Component Breakdown
Understanding the role of each ingredient helps you troubleshoot on the fly. We are looking for high fat content in the dairy to ensure the smoothest possible texture after it hits the heat.
| Ingredient | Science Role | Pro Secret |
|---|---|---|
| Whole Milk Ricotta | Primary moisture source | Drain in a fine mesh sieve for 10 mins to prevent sogginess. |
| Large Egg Yolk | Protein emulsifier | Prevents the cheese from "breaking" or becoming oily when hot. |
| Lemon Zest | Acidic brightener | Cuts through the heavy fats without thinning the filling consistency. |
| Kosher Salt | Protein denaturant | Helps the chicken fibers hold onto water during the sear. |
Using the right salt matters more than you think. Table salt is too fine and can make things harsh, while kosher salt has larger flakes that distribute seasoning more evenly across the meat's surface.
Ingredients and Smarter Swaps
You probably have most of this in your fridge already, but don't be afraid to pivot if you're missing something. The goal is a quick dinner, not a frantic trip to the grocery store.
- 4 large chicken breasts: 1.5 lbs total. Why this? Lean protein that provides a large surface area for rolling.
- Sub: Turkey cutlets. They roll just as easily but cook slightly faster.
- 1 cup whole milk ricotta: Why this? Provides the creamy, mild base for the filling.
- Sub: Small curd cottage cheese. Blitz it in a blender first for a similar texture.
- 1/4 cup Parmesan cheese: Why this? Adds a salty, umami kick and helps firm the filling.
- Sub: Pecorino Romano. Note: It's saltier, so reduce the added kosher salt slightly.
- 1/2 cup baby spinach: Why this? Adds color and a boost of nutrients.
- Sub: Finely chopped kale. Just make sure to remove the tough center ribs.
- 2 cloves garlic: Why this? Essential aromatic depth.
- Sub: 1/2 tsp garlic powder. Use this if you want a more subtle, even flavor.
- Fresh Basil & Thyme: Why this? Provides that "garden fresh" aroma.
- Sub: 1 tsp dried Italian seasoning. It's more concentrated, so use less.
Minimal Tools for Success
You don't need a kitchen full of gadgets for this. A heavy bottomed skillet is your best friend here because it holds heat consistently, which is what gives us that beautiful mahogany crust.
I prefer a cast iron skillet or a heavy stainless steel pan. If you use a thin non stick pan, the chicken might steam instead of searing, and you'll miss out on that texture. You'll also need some plastic wrap and a meat mallet (or even a heavy saucepan) to flatten the chicken evenly.
Uniform thickness is the secret to making sure the outside isn't rubbery by the time the inside is safe to eat.
Simple step-by-step Guide
Preparing the Chicken Cutlets
Slice each breast in half horizontally to create thin cutlets. Place them between two sheets of plastic wrap and pound them to a consistent 1/4 inch thickness. Note: This ensures the chicken cooks at the same rate as the filling warms.
Whipping the Filling
In a small bowl, combine the drained ricotta, chopped spinach, Parmesan, minced garlic, basil, thyme, egg yolk, and lemon zest. Mix until well combined.
Seasoning the Base
Sprinkle both sides of your flattened chicken cutlets with the kosher salt, cracked black pepper, and garlic powder. Season until every inch is lightly dusted.
Securing the Rolls
Spread about 2 tablespoons of the ricotta mixture onto each cutlet, leaving a small border at the edges. Roll the chicken tightly, starting from the narrow end. Note: Use a toothpick to secure the seam if the rolls feel loose.
Searing for a Mahogany Crust
Heat the olive oil and butter in your skillet over medium high heat. Once the butter is foaming, add the chicken rolls seam side down.
Execuring the Cook
Cook for 5 to 6 minutes per side until the exterior is golden and the chicken feels firm to the touch.
Reaching Safety
Continue cooking, turning occasionally, until the internal temperature reaches 165°F.
The Final Rest
Remove the rolls from the pan and let them sit on a cutting board for 5 minutes. Wait until the juices settle before removing toothpicks and slicing. This prevents the filling from spilling out.
Fixing Common Cooking Hurdles
Why Your Filling Leaked
This usually happens because the chicken wasn't rolled tightly enough or the ricotta was too wet. If you see cheese escaping, don't panic. Just let it brown in the pan; those crispy cheese bits are actually delicious.
| Problem | Root Cause | Solution |
|---|---|---|
| Dry Meat | Overcooking past 165°F | Use a meat thermometer to pull at exactly 162°F; carryover heat does the rest. |
| Filling is Runny | Too much moisture in ricotta | Drain ricotta in cheesecloth or a fine sieve for 15 mins before mixing. |
| Pale Crust | Pan wasn't hot enough | Wait for the oil to shimmer and the butter to stop bubbling before adding meat. |
Common Mistakes Checklist
- ✓ Pat the chicken completely dry with paper towels before seasoning (moisture is the enemy of a good sear).
- ✓ Don't overfill the cutlets; a thin, even layer of cheese stays put much better than a thick glob.
- ✓ Place the chicken seam side down first to "weld" the roll shut with heat.
- ✓ Avoid moving the chicken for the first 3 minutes to allow a proper crust to form.
- ✓ Always use whole milk ricotta; low-fat versions have higher water content and will collapse.
Flavor Variations and Adjustments
If you are looking for a different vibe, this recipe is incredibly flexible. You can swap the spinach for sun dried tomatoes or even add a little kick with red pepper flakes. For a completely different texture, you could try the wrapping technique found in a Chinese Cabbage Rolls recipe, though the flavor profile here is strictly Mediterranean.
| Method | Time | Texture | Best For |
|---|---|---|---|
| Stovetop Skillet | 15 mins | Crispy, caramelized skin | Quick weeknight dinner |
| Oven Baked (400°F) | 22 mins | Soft, tender, and juicy | Hands off cooking for a crowd |
| Air Fryer (375°F) | 12 mins | Extra crunchy exterior | Small batches or singles |
If you want a smokier flavor, try wrapping the entire roll in a piece of thin prosciutto before searing. The salty ham crisps up beautifully and adds another layer of protection for the chicken.
Scaling for Larger Groups
When doubling this recipe for a family gathering, work in batches. Overcrowding the pan will drop the temperature too quickly, leading to gray, steamed chicken instead of golden rolls.
For the spices, you don't need to double everything exactly. Use 1.5x the salt and pepper first, then adjust. If you are baking these instead of searing, use a larger casserole dish and leave at least an inch of space between each roll so the heat can circulate.
You might need to increase the bake time by about 5 minutes if the pan is very full.
Storage and Scrappy Ideas
Keep leftovers in an airtight container in the fridge for up to 3 days. When reheating, I highly recommend using the oven or a toaster oven at 350°F (180°C) rather than the microwave. Microwaving often makes the chicken rubbery and the cheese can separate.
These rolls freeze surprisingly well. You can freeze them raw (but assembled) for up to 2 months. Just thaw them completely in the fridge before searing. If you have leftover filling, don't throw it out! It makes a fantastic spread for crackers or a quick white sauce for pasta if you whisk in a splash of warm milk.
Perfect Side Dish Pairings
Because this dish is quite rich and creamy, it pairs best with something bright or crunchy. A simple arugula salad with a lemon vinaigrette works wonders to cut through the fat of the ricotta and Parmesan.
If you want something heartier, serve these over a bed of garlic butter pasta or alongside some roasted asparagus. The juices from the pan make a light "sauce" that ties everything together. It’s a complete meal that feels balanced and satisfying without leaving you feeling weighed down.

Recipe FAQs
Should I pound the chicken breasts thin, or can I leave them thick?
Pound them thin to about 1/4 inch. Uniform thickness ensures the lean chicken cooks completely before the delicate ricotta filling overheats or escapes.
How can I prevent the ricotta filling from leaking out during searing?
Use whole milk ricotta and drain excess liquid first. The key is minimizing moisture in the cheese and securing the roll tightly, seam side down first, when hitting the hot pan.
What is the absolute internal temperature required for safe eating?
The minimum safe internal temperature is 165°F (74°C). Always use a meat thermometer inserted into the thickest part of the roll to confirm doneness, then allow it to rest briefly.
Can I use low-fat ricotta instead of whole milk ricotta for this recipe?
No, stick to whole milk ricotta for best results. low-fat versions contain more water, which will thin the filling and increase the chance of leakage during the searing process.
How should I adjust this recipe if I want to bake it instead of pan-searing?
Bake at 400°F (200°C) for about 20 to 22 minutes. You miss the initial crust, but this is great for hands off cooking; if you want that intense sear flavor, apply the searing technique used in the Mushroom Asiago Chicken recipe first.
What is the secret ingredient that keeps the filling creamy and prevents it from separating?
Adding a single egg yolk is crucial for stabilization. This technique, which relies on protein binding, helps create a stable emulsion that holds up under heat, much like the binding logic in a Greek Yogurt Chicken recipe base.
How long must the cooked rolls rest before slicing to prevent juice loss?
Rest the finished rolls for a minimum of 5 minutes. This short resting period allows the internal meat fibers to relax and reabsorb the juices, ensuring a moister bite and keeping the cheese filling intact.
Ricotta Stuffed Chicken Rolls
Ingredients:
Instructions:
Nutrition Facts:
| Calories | 514 kcal |
|---|---|
| Protein | 62.2 g |
| Fat | 26.1 g |
| Carbs | 3.2 g |
| Fiber | 0.3 g |
| Sugar | 1.1 g |
| Sodium | 762 mg |
