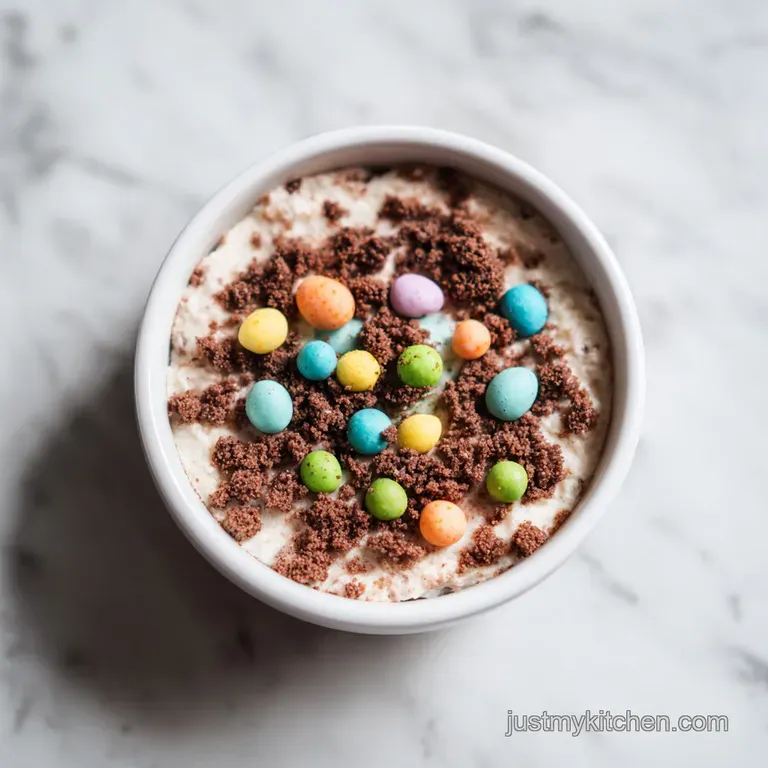
Easter Dirt Cake Casserole: Creamy and No-Bake

- Time:20 minutes active + 3 hours chilling = 3 hours 20 minutes total
- Flavor/Texture Hook: Shatter crisp chocolate crust with a silky, mousse like vanilla center
- Perfect for: Easter Sunday lunch, potlucks, or a low stress spring birthday party
- Create a Cool and Creamy Easter Dirt Cake Casserole
- The Secret to the Structural Creaminess
- The Component Analysis
- Gathering Every Single Component for Your Spring Casserole
- Tools to Help You Build the Perfect Layers
- Master the Layering Process for Maximum Visual Impact
- Avoiding Common Kitchen Pitfalls During Assembly
- Clever Ways to Scale or Modify the Dish
- Keeping Your Leftovers Fresh and Using Up Scraps
- How to Plate and Present Your Garden Creation
- Recipe FAQs
- 📝 Recipe Card
Create a Cool and Creamy Easter Dirt Cake Casserole
Have you ever wondered why we are so obsessed with eating "dirt" every spring? There is something incredibly nostalgic about the sound of a food processor whirring as it turns solid chocolate cookies into a fine, dark sand.
I remember the first time I made this for a family gathering; my nephew looked at the "grass" and "soil" with pure suspicion until he took that first spoonful of the velvety vanilla cloud hidden underneath.
It’s the ultimate edible illusion, and honestly, it’s much more satisfying than a traditional baked cake when the weather starts to warm up.
We are taking the classic childhood treat and giving it a massive upgrade by turning it into a structured casserole. Instead of messy individual cups, this version uses a cream cheese base to provide enough stability that you can actually cut clean, beautiful squares.
It’s budget friendly, requires zero oven time, and uses ingredients you can find at any local grocery store without having to hunt through specialty aisles.
This recipe is all about the contrast between the gritty, cocoa heavy "soil" and the light, airy filling. We aren't just mixing pudding and milk; we are folding in softened cream cheese and whipped topping to create a texture that feels closer to a French silk pie than a lunchbox snack.
You'll get that satisfying crunch from the Oreo base, followed by a melt in-your mouth center that isn't cloyingly sweet. Let’s get into why this specific method works so much better than the soggy versions you might have had in the past.
The Secret to the Structural Creaminess
- Fat Emulsification: Beating the cream cheese and butter together creates a stable fat network that prevents the pudding from becoming watery as it sits.
- Moisture Barrier: Mixing the cookie crumbs with melted butter for the base creates a semi permeable seal, which keeps the bottom layer from turning into mush when the moist filling is added.
- Protein Set: Using whole milk rather than skim provides enough protein and fat to help the instant pudding bond with the cream cheese, ensuring a sliceable consistency after the 3 hours of chilling.
- Aeration Retention: Folding not stirring the whipped topping preserves tiny air bubbles, which is what gives the casserole its signature mousse like feel rather than a heavy, dense bite.
| Method | Time | Texture | Best For |
|---|---|---|---|
| Quick Casserole | 20 mins + 3 hrs chill | Velvety and sliceable | Large family gatherings |
| Individual Cups | 45 mins | Soft and scoopable | Kids' classroom parties |
| Trifle Style | 15 mins | Very airy and loose | Casual backyard BBQ |
When you are looking for a dessert that feels a bit more substantial but still keeps that no bake ease, you might also enjoy a Vanilla Dream Cake for your next celebration. While this dirt cake is all about the "soil" and "grass," the dream cake offers a more traditional crumb for those who want a classic bake alongside their no bake treats.
The Component Analysis
| Ingredient | Science Role | Pro Secret |
|---|---|---|
| Cream Cheese | Provides structural "backbone" and tang | Use full fat blocks; the "spreadable" tub versions have too much water and will make the cake runny. |
| Instant Pudding | Acts as a thickening agent through starch | Whisk it with cold milk for exactly 2 minutes to jumpstart the thickening before folding. |
| Unsalted Butter | Binds the crust and enriches the filling | Ensure the 1/4 cup for the filling is truly at room temperature to avoid tiny yellow fat lumps. |
Gathering Every Single Component for Your Spring Casserole
- 14.3 oz Chocolate Oreo Cookies: The classic choice for "dirt" because the dark cocoa provides the perfect color and a slightly bitter edge to balance the sweet cream.
- 6 tbsp Unsalted Butter, melted: Why this? It acts as the "glue" that turns loose crumbs into a solid, buttery crust.
- 8 oz Cream Cheese, softened: Why this? Provides the density needed to make the pudding sliceable instead of just scoopable.
- 1/4 cup Unsalted Butter, softened: Why this? Adds a rich, silky mouthfeel to the cream cheese layer.
- 1 cup Powdered Sugar: A fine textured sweetener that dissolves instantly into the fats.
- 6.8 oz Instant Vanilla Pudding mix: Use two 3.4 oz packages for the perfect ratio of flavor to thickness.
- 3 cups Cold Whole Milk: Why this? Higher fat content leads to a sturdier set than 1% or skim milk.
- 12 oz Whipped Topping, thawed: Provides the "air" in the mousse.
- 1 cup Shredded Coconut: The base for our "edible grass."
- 3 drops Green Food Coloring: Transforms the coconut into a vibrant spring pasture.
- 1 cup assorted Easter Candy: Use Marshmallow Peeps and Robin Eggs for that iconic garden look.
| Original Ingredient | Substitute | Why It Works |
|---|---|---|
| Chocolate Oreos | Chocolate Graham Crackers | Similar cocoa profile but a slightly more "honey" aftertaste. |
| Whole Milk | Oat Milk (Full Fat) | Provides a creamy texture. Note: Filling may be slightly softer than with dairy. |
| Vanilla Pudding | White Chocolate Pudding | Offers a deeper, more "gourmet" flavor while keeping the same light color. |
| Whipped Topping | Stabilized Whipped Cream | Gives a more natural flavor. Note: Must be stabilized with gelatin to hold up. |
Tools to Help You Build the Perfect Layers
You don't need a professional kitchen for this, but a few specific tools make a world of difference. A food processor is the fastest way to get those Oreos into a uniform "soil" texture.
If you don't have one, a gallon sized freezer bag and a rolling pin work wonders for some stress relief crumb making.
You'll also want a 9x13-inch glass casserole dish. Glass is better than metal here because it lets you see those beautiful layers from the side, and it stays colder in the fridge.
An offset spatula is my "secret weapon" for smoothing out the pudding layer without dragging the cookie crumbs from the bottom back up to the surface. Finally, a stand mixer (like a KitchenAid) or a sturdy hand mixer is essential for getting the cream cheese and butter mixture truly fluffy doing that by hand is a workout you probably don't want.
Master the Layering Process for Maximum Visual Impact
- Pulse the Oreo cookies in a food processor until they reach a fine, sandy consistency. Note: Don't over process into a paste; you want some tiny grit for texture.
- Combine the crumbs with 6 tablespoons of melted butter in a bowl.
- Press two thirds of the mixture firmly into the bottom of your 9x13-inch dish. Cook 0 mins because this is a pure no bake base! Set the remaining crumbs aside.
- Beat the softened cream cheese and 1/4 cup of softened butter in a large bowl until the mixture looks pale and smooth.
- Gradually add the powdered sugar and continue beating until the texture is light and fluffy, about 3 minutes.
- Whisk the instant pudding mix and cold whole milk in a separate bowl for exactly 2 minutes.
- Let the pudding stand for 1 to 2 minutes until it starts to resist the whisk, then fold it into the cream cheese mixture using a spatula.
- Gently fold in the thawed whipped topping using a slow, circular motion until no white streaks remain.
- Pour the filling over the Oreo base and smooth it out. Scatter the remaining crumbs on top to cover the "filling" completely.
- Toss the coconut with food coloring in a small bowl until it’s a bright green, then decorate with Peeps and Robin Eggs.
- Refrigerate for at least 3 hours to allow the fats to emulsify and the structure to set properly.
Avoiding Common Kitchen Pitfalls During Assembly
Why Your Filling Is Too Runny
If you find that your "cake" is more like a "soup" when you try to slice it, the most common culprit is the temperature of your ingredients. If the milk wasn't truly cold, the instant pudding won't react correctly with the starches.
Alternatively, if you over beat the mixture after adding the whipped topping, you've deflated all the air that provides the structure.
| Problem | Root Cause | Solution |
|---|---|---|
| Lumpy center | Cream cheese was too cold | Let the cheese sit at room temp for 2 hours before mixing. |
| Soggy base | Butter wasn't mixed well | Ensure every crumb is coated in melted butter before pressing. |
| Faded grass | Too much liquid coloring | Use gel coloring or just 2-3 drops of liquid to avoid soggy coconut. |
Why Your Pudding Is Lumpy
This usually happens when the cream cheese and butter aren't fully integrated before you add the liquids. Once you add that cold milk, any tiny bits of solid fat will seize up and stay as little yellow dots in your filling.
Always make sure that cream cheese butter sugar base is as smooth as silk before the pudding enters the chat.
Common Mistakes Checklist
- ✓ Use full fat, brick style cream cheese (low-fat has too much water).
- ✓ Ensure your whipped topping is completely thawed but still cold.
- ✓ Press the crust firmly using the bottom of a measuring cup for a flat surface.
- ✓ Don't skip the 3 hour chill; the pudding needs that time to fully hydrate.
- ✓ Add the candy decorations right before serving to prevent the sugar from bleeding.
Clever Ways to Scale or Modify the Dish
If you're hosting a smaller crowd, you can easily cut this recipe in half. Use an 8x8-inch square pan and follow the same layering process. Since there's no baking involved, you don't have to worry about adjusting oven temperatures, but I’d still recommend chilling it for the full 3 hours to ensure it holds its shape.
Scaling up for a massive party? You can double the ingredients and use two separate 9x13 dishes. I find it’s better to make two separate batches of the filling rather than one giant one, as it's hard to fold in the whipped topping evenly when the bowl is overflowing. If you’re looking for a different texture profile for a large crowd, you might consider the Russian Napoleon Cake which offers a more traditional, multi layered pastry experience that pairs beautifully with this no bake option.
| If you want... | Do this... |
|---|---|
| A richer flavor | Use dark chocolate Oreos and chocolate pudding. |
| A lighter "dirt" | Use Golden Oreos for a "sand" cake look. |
| Individual servings | Layer the components in clear 9 oz plastic cups. |
Keeping Your Leftovers Fresh and Using Up Scraps
Storage: This easter dirt cake casserole keeps beautifully in the fridge for up to 4 days. Keep it covered tightly with plastic wrap or a lid to prevent the "grass" from drying out or the cream from absorbing fridge odors.
Note that the cookie crumbs will naturally soften over time as they absorb moisture from the pudding, so the "crunch" factor will decrease after day two.
Freezing: I don't generally recommend freezing the entire casserole because the texture of the cream cheese and pudding can become slightly grainy when thawed. However, if you do freeze it, it tastes a lot like a frozen yogurt bar! Wrap it in double foil and freeze for up to 1 month.
Eat it semi frozen for the best experience.
Zero Waste: If you have leftover cookie crumbs, save them in a jar to sprinkle over morning yogurt or oatmeal. Leftover shredded coconut can be toasted and used as a topping for a Spinach Mushroom Breakfast Casserole to provide a surprising savory sweet crunch, or simply stored in the freezer for your next baking project. If your Peeps get a little stale, they are actually fantastic when melted into a cup of hot cocoa!
How to Plate and Present Your Garden Creation
When it’s finally time to serve, don’t just scoop it out haphazardly. Use a sharp knife to cut through the crust first, then use a wide spatula to lift the squares out. The first piece is always the hardest to get out cleanly consider it the "chef's tax" and eat it yourself!
To make it look like a real spring garden, I like to tuck a few sprigs of fresh mint around the candy "eggs" just before bringing it to the table. It adds a fresh aroma that cuts through the richness of the chocolate and cream.
If you’re serving this at a party, place the dish on a light colored wooden board or a pastel tablecloth to really make those green and chocolate colors pop. It’s a joyful, messy, delicious tribute to spring that never fails to bring out the inner child in everyone at the table.
Just remember to warn people that the "dirt" is actually chocolate though after one bite, they’ll figured it out anyway!

Recipe FAQs
Can I use low-fat cream cheese for this casserole?
No, avoid low-fat versions. They contain too much water, which will prevent your layers from setting firmly. Use full fat, brick style cream cheese to ensure the filling structure remains stable.
How to ensure the Oreo crust holds together?
Press the crumb mixture firmly into the bottom of the dish. Use the flat bottom of a measuring cup to compress the crumbs evenly, which prevents the base from crumbling when you slice into the finished dessert.
Is it true I can serve this immediately after assembling?
No, this is a common misconception. You must refrigerate the casserole for at least 3 hours. This cooling period is essential for the pudding to fully hydrate and the fats to emulsify, ensuring the dessert sets properly before serving.
How to keep the Easter candies looking fresh?
Add the candy decorations right before serving. Placing them on too early can cause the sugar from the candies to bleed into the whipped topping or cause the marshmallow elements to dissolve.
Why is my filling not thickening correctly?
Ensure your whipped topping is completely thawed but still cold before folding. If it is warm or icy, it will break the emulsion of the cream cheese and pudding mixture. If you enjoyed mastering this creamy texture, you can apply similar blending principles when making our Blueberry Cheesecake Protein Bites.
How to get the perfect green grass color for the coconut?
Toss the shredded coconut with only 3 drops of green food coloring in a small bowl. Stir thoroughly until the color is evenly distributed and no white spots remain, then scatter it over the top layer.
How to achieve the best consistency with the instant pudding?
Whisk the pudding mix and cold whole milk for exactly 2 minutes. Allow the mixture to stand for 1 to 2 minutes so it can thicken properly before you fold it into the cream cheese base.
Easter Dirt Cake Casserole

Ingredients:
Instructions:
Nutrition Facts:
| Calories | 409 kcal |
|---|---|
| Protein | 4.7 g |
| Fat | 19.2 g |
| Carbs | 54.8 g |
| Fiber | 1.2 g |
| Sugar | 39.5 g |
| Sodium | 362 mg |
