Healthy Breakfast Burritos Freezer Friendly

- Time: Active 20 minutes, Passive 15 minutes, Total 35 minutes
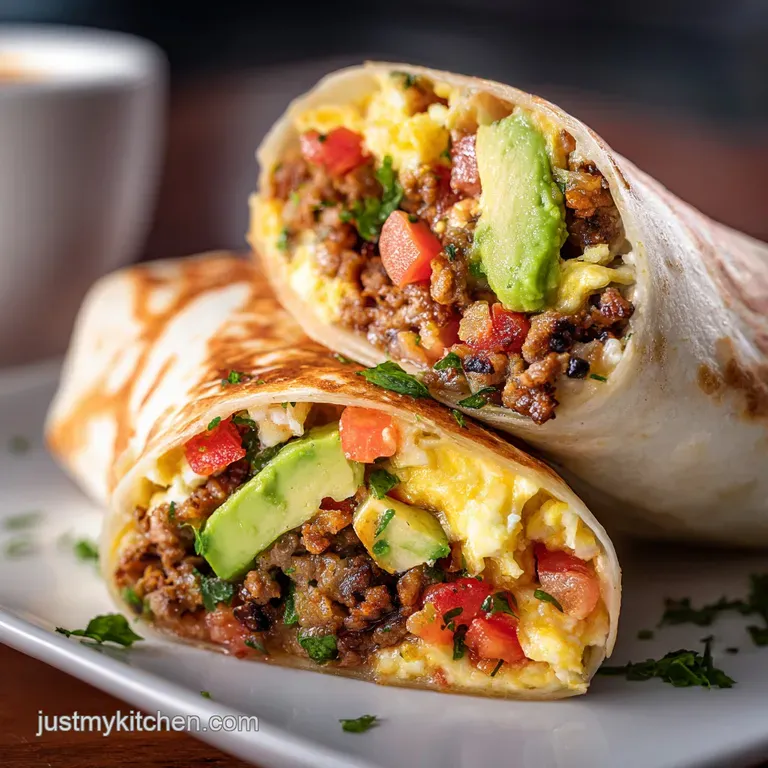
- Flavor/Texture Hook: Savory, smoky protein wrapped in a soft, toasted whole wheat shell
- Perfect for: Busy Monday mornings, post workout recovery, and budget conscious meal prep
Master These Healthy Breakfast Burritos Freezer Friendly
Imagine waking up on a chaotic Monday morning, the alarm chirping way too early, and your stomach already growling for something nutritious. Instead of reaching for a sugary cereal or a greasy drive thru bag, you open your freezer and grab a hand rolled, high protein meal that's ready in minutes.
The aroma of smoked paprika and sautéed peppers fills the air as you reheat it, giving you that incredible head start we all need.
I used to think meal prepping breakfast was a chore, but honestly, it’s the ultimate gift to your future self. There is something so satisfying about seeing a stack of silver wrapped bundles in the freezer, knowing you've saved money and secured 32 grams of protein per serving.
We’ve all made the mistake of rushing into the day without fuel, only to crash by 10:00 AM, but this recipe changes that cycle for good.
This isn't just a basic scramble in a wrap. We are focusing on nutrient dense ingredients like pasture raised eggs and fresh spinach to ensure every bite counts toward your health goals. It's a practical, budget smart approach that doesn't sacrifice flavor for convenience.
Trust me on this, once you nail the cooling technique I'm about to show you, you'll never go back to buying pre packaged frozen meals again.
Science Behind Nutritious Prep
Maillard Reaction: Searing the ground turkey creates complex flavor compounds that provide a deep, savory base without needing excess salt or fat.
Starch Retrogradation: Cooling the beans and veggies before wrapping prevents the tortilla from absorbing escaping steam, which keeps the texture firm.
Protein Denaturation: Whisking almond milk into the eggs disrupts tight protein bonds, resulting in a softer, more velvety scramble that won't turn rubbery in the freezer.
The following table helps you decide between using fresh, nutrient dense components or opting for time saving shortcuts when you're in a pinch.
| Strategy | Fresh Method | Shortcut Method | Impact |
|---|---|---|---|
| Protein | Lean ground turkey | Pre cooked turkey crumbles | Fresh is lower in sodium; shortcut saves 5 mins |
| Vegetables | Hand diced peppers/onions | Frozen pepper and onion mix | Fresh provides better crunch; frozen is budget friendly |
| Legumes | Rinsed canned black beans | Pre seasoned refried beans | Canned beans offer more fiber; refried can be oily |
While using fresh ingredients is ideal for a nutrient dense profile, the shortcut method is a great backup when your schedule is packed. Just keep an eye on the sodium levels if you go the pre packaged route.
Essential Nutrients and Flavor
When we look at the ingredient list, it's all about balance. The combination of lean ground turkey and pasture raised eggs provides a high protein foundation that is essential for muscle repair and satiety.
Using whole wheat tortillas instead of white flour versions adds a significant boost of fiber, which helps regulate blood sugar throughout the morning.
The spices are where the magic happens without adding calories. Smoked paprika gives that "incredible" char grilled taste, while cumin adds an earthy depth. I've found that using sharp cheddar is a smart budget move because its intense flavor means you can use less while still getting that silky, melted cheese experience in every bite.
1. The Moisture Barrier Method
To prevent the dreaded soggy burrito, we use the spinach and beans as a protective layer. By sautéing the spinach until the moisture evaporates, we ensure it doesn't release water inside the wrap during storage. It's a simple step that makes a massive difference in the final texture.
2. Flash Cooling Protocol
Never wrap a hot filling! This is a mistake I made for years. When you wrap hot eggs, steam gets trapped against the tortilla, turning it into mush. Spread your cooked fillings on a large baking sheet and let them reach room temperature before you even touch a tortilla.
3. High Volume Fill
We want these burritos to be filling without being heavy. By loading up on diced bell peppers and red onions, we add volume and micronutrients like Vitamin C and B6. This makes the burrito feel substantial and satisfying without the need for heavy creams or extra oils.
| Ingredient | Science Role | Pro Secret |
|---|---|---|
| Ground Turkey | Lean protein structure | Brown it deeply for maximum umami flavor |
| Pasture Raised Eggs | Binding agent & healthy fats | Cook them slightly underdone; they finish while reheating |
| Black Beans | Fiber & complex carbs | Dry them completely after rinsing to avoid sogginess |
Using these specific components ensures your meal prep is both functional and delicious. For another high protein option that works well for dinner prep, you might enjoy this Air Fryer Whole Chicken recipe.
### For the Protein Base
- 1 lb lean ground turkey: High protein and lower in saturated fat than beef.
- 10 large pasture raised eggs: Rich in Omega-3s and provides a velvety texture.
- 1/4 cup unsweetened almond milk: Adds moisture to the eggs without dairy fats.
- 1.5 cups shredded sharp cheddar: Intense flavor and great melting capability.
### For the Fiber & Crunch
- 15 oz can black beans: Rinsed and dried. Why this? Essential for fiber and stabilizing blood sugar.
- 2 medium bell peppers: Diced small. Why this? Adds crunch and a boost of Vitamin C.
- 1 small red onion: Minced for sharp, savory notes.
- 2 cups fresh baby spinach: Chopped fine to integrate easily.
Tools for Success
You don't need a professional kitchen, but a few specific tools make this process much smoother. A large non stick skillet is vital for the eggs to prevent sticking and tearing. I also recommend a wide rimmed baking sheet for the cooling phase, as it provides more surface area for heat to escape quickly.
Having a stack of precut aluminum foil squares (about 12x12 inches) ready to go is a life saver. It keeps the assembly line moving fast so the tortillas don't dry out while you're working. If you're looking to expand your meal prep kit, a good set of glass containers is also a great investment for long term storage.
| Original Ingredient | Substitute | Why It Works |
|---|---|---|
| Lean Ground Turkey | Ground Chicken | Similar lean profile. Note: Chicken is slightly milder in flavor |
| Whole Wheat Tortillas | gluten-free Wraps | Accommodates allergies. Note: Often more brittle; must be heated well |
| Sharp Cheddar | Nutritional Yeast | For a dairy-free option. Note: Adds a nutty, cheesy flavor without the fat |
If you decide to swap the beans for a different vegetable, like roasted sweet potatoes, you can follow a similar technique to my Air Fryer Roasted recipe to get them perfectly tender before adding them to the wrap.
step-by-step Prep
### Phase 1: The Protein & Veggie Sauté
- Brown the turkey. In a large skillet over medium high heat, cook the 1 lb lean ground turkey with 1/2 tsp salt, 1/2 tsp black pepper, 1 tsp smoked paprika, and 1/2 tsp cumin. Cook 7 minutes until no pink remains and edges are crisp.
- Sauté the aromatics. Add the diced bell peppers and minced red onion to the turkey. Sauté for 5 minutes until peppers are tender crisp.
- Wilt the spinach. Stir in the 2 cups of chopped baby spinach and the rinsed black beans. Cook for 2 minutes until the spinach collapses and moisture has evaporated.
- Cool the mixture. Transfer the turkey and veggie mix to a large plate or tray. Spread it out thinly. Note: This stops the cooking process and prevents steam buildup.
### Phase 2: The Velvety Scramble
- Whisk the eggs. In a large bowl, beat the 10 eggs with 1/4 cup almond milk. Note: The milk helps keep the eggs soft during the freezing and reheating process.
- Scramble gently. Wipe the skillet clean and return to medium heat. Pour in the egg mixture. Cook for 4 minutes, stirring constantly until just set but still glossy.
- Combine cautiously. Fold the egg scramble into the cooled turkey and veggie mixture. Let the whole batch sit for 10 minutes to reach room temperature.
### Phase 3: The Strategic Roll
- Prepare the tortillas. Heat the whole wheat tortillas in the microwave for 15 seconds. Note: This makes them pliable and prevents them from snapping.
- Assemble the layers. Place a generous scoop of filling in the center of a tortilla and top with 3 tablespoons of shredded cheddar.
- Seal and wrap. Fold the sides in, then roll tightly from the bottom. Immediately wrap in aluminum foil to seal in the freshness.
Solving Common Prep Hurdles
One of the most frequent issues with breakfast burritos is the tortilla cracking during the folding process. This usually happens because the wrap is too cold or has lost its moisture.
By giving them a quick steam in the microwave or on a warm pan, you activate the gluten and make them stretchy enough to hold the high protein filling.
Another common complaint is the "bland" factor after freezing. Cold temperatures can dull the perception of spice. I always suggest being a bit more aggressive with the smoked paprika and cumin than you would for a fresh meal.
This ensures that even after a month in the freezer, the flavors remain vibrant and delicious.
Soggy Burrito Prevention
If your burritos are coming out wet, it’s almost always a moisture management issue. Did you drain the beans? Did you cook the spinach until dry? Most importantly, did you let the filling cool? If you skip the cooling step, you are essentially steaming the bread from the inside out.
Prevent Tortilla Cracks
Using whole wheat can be tricky because it’s less elastic than white flour. If you find your brand is particularly stubborn, try placing a damp paper towel over the stack of tortillas while you microwave them. This creates a mini sauna that softens the fibers perfectly for rolling.
Flavor Profiles
Don't be afraid to experiment with the spice ratios. If you love heat, adding a diced jalapeño to the sauté phase is a great way to improve the nutritional profile with capsaicin while adding a kick. For a more "incredible" earthy flavor, you could even add a pinch of dried oregano or coriander.
| Problem | Root Cause | Solution |
|---|---|---|
| Burrito bursts open | Overfilling the center | Use 1/2 cup filling max for large tortillas |
| Eggs are rubbery | Overcooked during initial sauté | Remove from heat while they still look slightly wet |
| Tortilla is gummy | Reheated too long in plastic | Use a paper towel to absorb excess moisture during microwave |
Common Mistakes Checklist
- ✓ Drain and pat dry the black beans to remove all canning liquid.
- ✓ Sauté the vegetables until they no longer release water in the pan.
- ✓ Allow the filling to cool to at least 70°F before assembly.
- ✓ Heat tortillas for 15-20 seconds before rolling to ensure elasticity.
- ✓ Wrap tightly in foil to prevent freezer burn and ice crystal formation.
Customizing Your Morning Meal
The beauty of these healthy breakfast burritos freezer friendly is how easily they adapt to your specific needs. If you are focused on weight loss, you might choose to increase the spinach and peppers while slightly reducing the cheese.
If you need a higher calorie count for a heavy training day, adding some diced avocado (fresh, not frozen) when serving is a great way to add healthy fats.
For those who want a bit of a shortcut without sacrificing too much nutrition, you can use a high-quality pre made salsa inside the burrito. Just be sure to simmer it down in the pan with the turkey first to remove the excess liquid. This adds a ton of flavor with very little extra effort or cost.
2 Flavor Variations
- Southwest Heat: Add 1 tbsp of canned green chiles and a dash of cayenne pepper to the turkey mix. Pair this with a dollop of Greek yogurt when eating for a sour cream vibe.
- Garden Fresh: Swap the black beans for extra sautéed zucchini and mushrooms. This is a great way to use up garden scraps and add different micronutrients.
2 Dietary Substitutions
- dairy-free: Use a plant based cheese shred or simply omit the cheese and add more seasoned black beans for creaminess.
- Low Carb: Use high fiber, low carb tortillas. These often need a bit more heat to become pliable, so don't skip the microwave step.
Budget Friendly Choices
If ground turkey is expensive this week, don't sweat it. You can easily substitute it with more eggs or even extra beans. Buying the "store brand" of frozen peppers can also save you a few dollars compared to fresh ones, and since we are sautéing them anyway, the texture difference is minimal. For more budget veggie ideas, check out the Air Fryer Garlic recipe for tips on perfectly seasoning greens.
Safe Storage and Reheating
Proper storage is the difference between a great meal and a freezer burnt mess. Once your burritos are wrapped in foil, place them in a heavy duty freezer bag. Squeeze out as much air as possible before sealing. This creates a double barrier against the cold air, keeping them fresh for up to 3 months.
When you're ready to eat, you have two main options. For the best texture, thaw the burrito in the fridge overnight. If you're in a rush, you can go from freezer to plate. Just remember to remove the foil before microwaving!
I've seen way too many "accidental light shows" in the kitchen because people forgot the foil wrapper.
Storage Specs: - Fridge: Keep for up to 4 days in an airtight container. - Freezer: Best used within 3 months for peak flavor.
- 1. Microwave
- Remove foil. Wrap in a damp paper towel. Heat for 1 minute 30 seconds (thawed) or 3 minutes (frozen), flipping halfway.
- 2. Oven/Toaster Oven
- Keep in foil. Heat at 350°F for 15 minutes (thawed) or 30 minutes (frozen) until the center is hot.
- 3. Skillet Crisp
- After microwaving, toss the burrito in a dry pan for 1 minute per side to get that incredible crispy exterior.
Zero Waste Tip: Don't throw away those broccoli stems or kale ribs! Finely mince them and sauté them right along with the onions and peppers. They add a great crunch and extra fiber without changing the flavor of the burrito.
Optimal Serving Suggestions
While these burritos are a complete meal on their own, a few fresh toppings can really make them feel like a restaurant quality breakfast. A scoop of fresh pico de gallo or a few slices of avocado adds a refreshing contrast to the warm, smoky filling.
If you're eating these at home, try serving them with a side of fruit to round out the meal.
I also love a good "power pairing" with a cup of black coffee or green tea. The bitterness of the coffee cuts through the richness of the eggs and cheese perfectly. If you've prepped these for a post workout meal, they provide the ideal 3:1 carb to protein ratio to help your muscles recover and your energy levels soar.
The Power Pairing
To make this a truly high protein feast, serve your burrito with a side of plain Greek yogurt seasoned with a little lime juice and cilantro. It acts as a nutritious substitute for sour cream, adding even more protein and probiotics to your morning routine.
| Problem | Cause | Fix |
|---|---|---|
| Center stays cold | Density of the filling | Cut the burrito in half before the final minute of reheating |
| Tortilla gets hard | Overheating/Dry air | Always use a damp paper towel when microwaving |
| Cheese didn't melt | Not enough heat reach | Let it sit for 1 minute after reheating to allow carryover heat to work |
If you want X, do Y
- If you want a crispier shell, finish the reheated burrito in a hot, dry skillet for 60 seconds.
- If you want fewer calories, swap the whole eggs for 2 cups of liquid egg whites.
- If you want extra creaminess, mix a tablespoon of salsa into the egg mixture before scrambling.
This meal prep strategy is a practical, health conscious way to take control of your mornings. By focusing on nutrient dense ingredients and smart techniques, you’re setting yourself up for an incredible day, one high protein bite at a time. Right then, let's get that skillet hot and start prepping!

Recipe FAQs
How long can I store these burritos in the freezer?
Up to 3 months. For best quality, seal them tightly in a heavy duty freezer bag after wrapping in foil to prevent freezer burn and ice crystal formation.
What's the best way to reheat a frozen breakfast burrito?
Remove foil and microwave. Wrap in a damp paper towel and heat for about 3 minutes, flipping halfway. For a crispy shell, finish in a dry skillet for a minute per side.
Why do my breakfast burritos turn out soggy after freezing?
Moisture management is key. Ensure all fillings are completely cooled to room temperature before assembly, and cook vegetables like spinach until all moisture has evaporated.
Can I use different proteins in these burritos?
Yes, lean ground chicken works well. It has a similar lean profile to turkey and will provide a good protein base.
How do I prevent the tortilla from cracking when I roll the burrito?
Warm the tortillas first. A quick 15-20 second zap in the microwave makes them pliable and less likely to tear, especially whole wheat varieties.
Is it necessary to cool the filling completely before assembling?
Yes, absolutely. Wrapping hot filling traps steam, which will make your tortilla gummy and the overall texture unpleasant.
Can I make these burritos dairy-free?
Yes, substitute with nutritional yeast. You can omit the cheddar cheese entirely or use a plant based cheese shred for a dairy-free option.
Healthy Breakfast Burritos Freezer Friendly

Ingredients:
Instructions:
Nutrition Facts:
| Calories | 478 kcal |
|---|---|
| Protein | 32 g |
| Fat | 21 g |
| Carbs | 42 g |
| Fiber | 8 g |
| Sugar | 3 g |
| Sodium | 780 mg |
