Easy Teriyaki Chicken in 20 Minutes
- Time: Active 10 minutes, Passive 10 minutes, Total 20 minutes
- Flavor/Texture Hook: Velvety umami glaze with crispy edged chicken
- Perfect for: Hectic weeknight dinners and high protein meal prep
- Why This Fast Glaze Works
- Components for the Perfect Sauce
- Everything You Need for Success
- Essential Gear for This Dish
- Cooking Timeline for Best Results
- Fixing Texture and Flavor Problems
- Smart Variations and Dietary Swaps
- Myths About Homemade Teriyaki
- Storage and Leftover Revitalization Tips
- Plating for a Professional Look
- Critical High in Sodium
- Recipe FAQs
- 📝 Recipe Card
The first time I tried making this at home, I ended up with a kitchen smelling like burnt sugar and chicken that felt like rubber. I had followed some generic recipe that asked me to simmer the sauce for an hour. Big mistake. The secret isn't in the time; it's in the intensity.
When that 1.5 lbs boneless skinless chicken thighs hits the hot neutral oil, you should hear a violent sizzle that lets you know a crust is forming.
We've all been there, standing in front of the fridge at 6:00 PM with zero motivation. This Teriyaki Chicken is my "emergency" meal because it relies on pantry staples like soy sauce and brown sugar.
The ginger and garlic hit the pan and immediately fill the room with that cozy, aromatic warmth that makes the whole family wander into the kitchen.
You aren't just making a meal here; you're mastering the balance of salt, acid, and sugar. It’s a fast paced dance of searing and glazing that results in a plate of food so glossy it looks like it belongs on a magazine cover.
Trust me, once you see how that cornstarch slurry transforms a thin liquid into a velvety coat, you’ll never go back to the bottled stuff.
Why This Fast Glaze Works
- Maillard Reaction: High heat browns the chicken proteins, creating deep savory compounds that a slow cooker simply can't replicate.
- Starch Gelatinization: The cornstarch molecules swell and trap water when heated, turning a thin sauce into a thick, clingy glaze in seconds.
- Hygroscopic Sugars: Brown sugar attracts moisture, keeping the chicken tender while simultaneously helping the sauce caramelize onto the meat.
- Acidic Denaturation: The rice vinegar cuts through the heavy salt of the soy sauce, balancing the pH and brightening the overall flavor profile.
The Physics of the Glaze
When you whisk that cornstarch slurry into the boiling sauce, you are triggering a rapid phase change. The heat forces the starch granules to burst and release amylose, which binds the liquid into a silky, translucent coating that grips the chicken.
Decision Shortcut Table
| Cook Method | Prep Time | Texture | Best For |
|---|---|---|---|
| over High heat Stovetop | 10 minutes | Crispy edges, thick glaze | Traditional finish |
| Air Fryer | 5 minutes | Extra crispy skin, dryer finish | Maximum crunch |
| One Pan Roast | 5 minutes | Tender, juicy, saucier | Low effort cleanup |
Sometimes I crave that extra crunch you get from an air fryer, similar to the technique used in my Air Fryer Crispy recipe. However, for this specific Teriyaki Chicken, the stovetop is king because it allows the sauce to reduce and emulsify right alongside the protein.
Components for the Perfect Sauce
Understanding what goes into your pan helps you adjust on the fly. We aren't just throwing things together; we are building layers of flavor.
| Ingredient | Science Role | Pro Secret |
|---|---|---|
| Chicken Thighs | Fat delivery & structure | Pat them bone dry for a better sear |
| Low Sodium Soy Sauce | Umami & seasoning base | Use low sodium to control the salt finish |
| Brown Sugar | Caramelization & sweetness | Pack it tight for consistent sweetness |
| Fresh Ginger | Aromatic pungency | Grate it frozen to get a fine paste |
Chef's Tip: Freeze your ginger root! It stays fresh for months, and when you grate it while frozen, it turns into a snow like fluff that dissolves instantly into the sauce without leaving woody chunks behind.
Everything You Need for Success
Gathering your ingredients beforehand is vital for a 20 minute Teriyaki Chicken. Once the heat is on, things move fast.
- 1.5 lbs chicken thighs: Cut into 1 inch pieces. Why this? Thighs stay juicy under high heat compared to lean breasts.
- 1 tbsp neutral oil: Like canola or grapeseed. Why this? High smoke point prevents the oil from tasting bitter.
- 1/2 cup low sodium soy sauce: The backbone of the dish. Why this? Provides the deep mahogany color and essential salt.
- 3 tbsp brown sugar: For that signature sweetness. Why this? Molasses in brown sugar adds more depth than white sugar.
- 1 tbsp rice vinegar: For balance. Why this? Its mild acidity brightens the heavy soy and sugar notes.
- 1 tsp cornstarch + 1 tbsp water: Our thickening agent. Why this? Creates the "glaze" effect without over reducing the sauce.
| Original Ingredient | Substitute | Why It Works |
|---|---|---|
| Rice Vinegar (1 tbsp) | Apple Cider Vinegar | Similar acidity. Note: Adds a slight fruity note but works well. |
| Brown Sugar (3 tbsp) | Honey (2 tbsp) | Honey is sweeter and more floral; reduces faster. |
| Fresh Ginger (1 tsp) | Ground Ginger (1/4 tsp) | Concentrated flavor. Note: Lacks the "zing" of fresh aromatics. |
Since we are talking about quick, family friendly meals, this fits right into the same rotation as my One Pot Chicken recipe. Both prioritize speed without sacrificing that deep, home cooked flavor we all want after a long day.
Essential Gear for This Dish
You don't need a professional kitchen, but the right pan makes a massive difference in how the chicken sears.
- Large Skillet or Wok: A heavy bottomed stainless steel or cast iron skillet (like a Lodge) is best. It holds heat better than thin aluminum, ensuring the chicken sears rather than steams.
- Microplane or Fine Grater: Essential for the ginger and garlic. We want them to melt into the sauce, not bite into a big chunk of raw garlic.
- Whisk: Small but mighty. You'll need this to ensure the cornstarch slurry is perfectly smooth before it hits the pan.
Cooking Timeline for Best Results
Prepping the Aromatics
- Cut the 1.5 lbs chicken thighs into uniform 1 inch pieces. Note: Uniformity ensures every piece cooks through at the exact same time.
- Mince the 2 cloves garlic and grate the 1 tsp fresh ginger. Note: Keep these separate from the liquid ingredients initially.
- Whisk the sauce base by combining 1/2 cup soy sauce, 1/4 cup water, 3 tbsp brown sugar, and 1 tbsp rice vinegar in a small bowl.
Searing the Protein
- Heat 1 tbsp neutral oil in your skillet over medium high heat until the oil shimmers.
- Add the chicken pieces in a single layer, seasoned with 1/2 tsp sea salt and 1/4 tsp cracked black pepper.
- Sear for 5-6 minutes without moving them too much, until the edges are golden and slightly crisp.
Thickening the Glaze
- Stir in the garlic and ginger, cooking for 30 seconds until fragrant but not browned.
- Pour in the soy sauce mixture and bring it to a bubbling simmer.
- Whisk 1 tsp cornstarch with 1 tbsp water and stir it into the pan.
- Simmer for 2 minutes while tossing the chicken until the sauce is glossy and coats the back of a spoon.
- Garnish with 1 tsp toasted sesame seeds and 2 sliced green onions before serving.
Fixing Texture and Flavor Problems

Why Your Chicken Is Soggy
If the chicken looks gray instead of brown, you likely overcrowded the pan. When too much cold meat hits the skillet at once, the temperature drops, and the juices leach out, boiling the chicken instead of searing it.
Why Your Sauce Is Too Salty
Soy sauce varies wildly by brand. If the result is a salt bomb, don't panic. You can fix it with a splash of water or an extra teaspoon of sugar.
| Problem | Root Cause | Solution |
|---|---|---|
| Thin, watery sauce | Cornstarch not activated | Bring to a full boil for 30 seconds to set the starch. |
| Bitter aftertaste | Burnt garlic | Add garlic at the very end of the searing process next time. |
| Tough chicken | Overcooked meat | Use thighs instead of breasts; they are much more forgiving. |
Common Mistakes Checklist
- ✓ Pat the chicken dry with paper towels before adding to the pan to ensure a crust forms.
- ✓ Don't skip the slurry - adding dry cornstarch directly to hot liquid creates permanent lumps.
- ✓ Preheat the pan for at least 3 minutes before adding the oil.
- ✓ Use low sodium soy sauce to prevent the glaze from becoming overwhelmingly salty as it reduces.
Smart Variations and Dietary Swaps
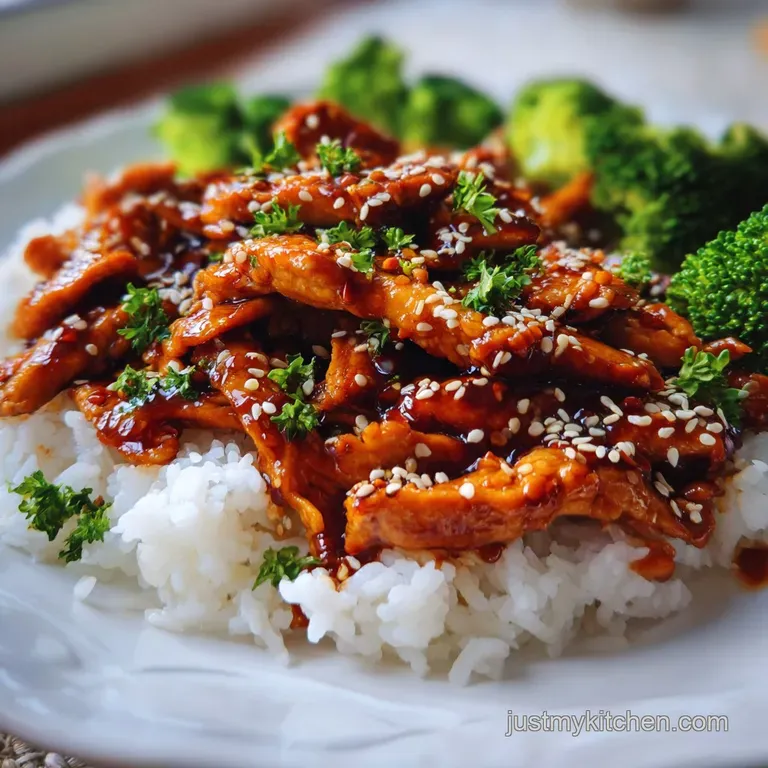
If you want to turn this into an Easy Teriyaki Chicken Stir Fry, simply toss in a bag of frozen stir fry veggies or some fresh broccoli florets when you add the sauce. The steam from the sauce will cook the veggies to a perfect crisp tender state.
Scaling the Recipe
- Down (1/2 batch): Use a smaller 8 inch skillet to prevent the sauce from evaporating too quickly. No need to change the cook time much.
- Up (2x batch): Do not double the salt immediately. Salt doesn't always scale linearly. Cook the chicken in two separate batches to maintain that vital sear, then combine everything at the glazing step.
Ingredient Shortcuts
| Goal | Shortcut | Trade off |
|---|---|---|
| Faster Prep | Jarred minced garlic | Slightly less "bite" than fresh cloves. |
| More Veggies | Pre cut broccoli florets | Can be more expensive than whole heads. |
| Lower Carb | Liquid aminos + Stevia | Thinner consistency; won't glaze as thickly. |
Myths About Homemade Teriyaki
One common myth is that you must marinate the chicken for hours. With this 20 Minute Teriyaki Chicken, the sauce is so potent and the chicken pieces are so small that the flavor coats every millimeter of the protein instantly.
Marinating often adds too much moisture to the surface, which actually prevents that beautiful sear we're looking for.
Another misconception is that the sauce needs to boil for a long time to thicken. In reality, once you add the cornstarch slurry, it only needs to hit a simmer for the molecules to bond. Boiling it for too long after that can actually break the starch bonds, making the sauce thin out again.
Storage and Leftover Revitalization Tips
Storage: This Teriyaki Chicken keeps beautifully in the fridge for up to 4 days in an airtight container. The flavors actually deepen overnight, making it a stellar option for meal prep bowls with white rice or quinoa.
Freezing: You can freeze the cooked dish for up to 2 months. To reheat, let it thaw in the fridge overnight.
Zero Waste Tip: Don't throw away those green onion roots! Put them in a jar of water on your windowsill, and they’ll regrow indefinitely. Also, if you have leftover sauce at the bottom of the pan, toss in some cold leftover rice the next day for a quick "teriyaki fried rice" breakfast.
Plating for a Professional Look
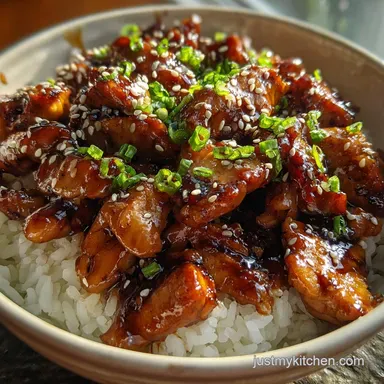
To make this look like a restaurant dish, contrast is everything. Serve the chicken over a snowy bed of fluffy jasmine rice. The dark, mahogany glaze pops against the white grain.
Adding Visual Contrast
- The Green Pop: Always add the sliced green onions at the very last second. The residual heat will wilt them just enough to release flavor, but they'll keep that vibrant neon green color.
- The Seed Sprinkle: Don't just dump the sesame seeds in the middle. Sprinkle them from about 12 inches above the plate to get an even, professional distribution.
- The Height Factor: Pile the chicken in the center of the bowl rather than spreading it flat. This creates a "mountain" of food that looks much more appetizing and keeps the heat trapped inside the pile longer.
Whether you're making this as a quick Easy 20Minute Teriyaki Chicken for a Tuesday night or prepping it for the week ahead, the result is always the same: a joyful, comfort filled meal that everyone actually wants to eat.
This dish is proof that you don't need a pantry full of "gourmet" items to create something truly special. Just high heat, a few staples, and 20 minutes of your time. Now, let's get that pan screaming hot!

Critical High in Sodium
1180 mg 1180mg of sodium per serving (51% 51% of daily value)
The American Heart Association recommends limiting sodium intake to about 2,300mg per day for overall cardiovascular health.
Smart Swaps to Lower Sodium
-
Low-Sodium Soy Sauce-30%
Replace the regular soy sauce with very low sodium soy sauce. This is the single biggest source of sodium in the recipe.
-
Reduce Added Salt-25%
Omit or significantly reduce the added sea salt. You can always add a pinch at the end if needed.
-
Dilute Soy Sauce-10%
Increase the water content slightly to dilute the sodium concentration of the soy sauce without sacrificing volume or flavor.
-
Unsweetened Applesauce-5%
Use unsweetened applesauce to add moisture, sweetness, and flavor while allowing you to reduce the amount of brown sugar.
-
Flavor Boost!
Enhance the flavors of the dish by using a variety of fresh or dried herbs and spices like garlic powder, onion powder, or red pepper flakes. These add flavor without adding sodium.
Recipe FAQs
Can I use chicken breasts instead of thighs?
No, thighs are strongly recommended. Thighs retain more moisture and remain juicy under the high heat required to properly sear the chicken and thicken the glaze.
How to get a thick, glossy glaze without overcooking the chicken?
Whisk cornstarch with cold water first to create a slurry. Add this slurry to the boiling sauce in the final two minutes of cooking; the sauce will thicken rapidly due to starch gelatinization.
Is it true that marinating the chicken first yields better flavor?
No, this is a common misconception for fast recipes. Marinating adds surface moisture, which inhibits the crucial Maillard reaction needed for a deep sear on the chicken pieces.
How to adjust the sauce if it turns out too salty?
Add a small splash of water or a touch more brown sugar. The added water dilutes the sodium concentration, while extra sugar helps re-establish the necessary sweet-to-salty balance.
How to substitute the rice vinegar for a different acid?
Use apple cider vinegar or white wine vinegar at a 1:1 ratio. If you enjoy mastering flavor balancing, see how the same acid principle brightens the flavor in our One Pan Mediterranean recipe.
What is the fastest way to mince the fresh ginger for this recipe?
Grate the ginger directly into the sauce bowl while frozen using a microplane. This technique shaves the ginger into a fine snow that dissolves completely during simmering, unlike larger chunks.
Why does my sauce sometimes turn out thin even after boiling?
You likely did not bring the cornstarch slurry to a full, rolling boil. The starch needs that intense heat to fully gelatinize and trap the liquid; if you enjoyed learning about controlling texture here, see how that same principle applies to controlling spread in baking by learning about fat ratios in
another context.
20 Minute Teriyaki Chicken
Ingredients:
Instructions:
Nutrition Facts:
| Calories | 308 kcal |
|---|---|
| Protein | 35.8 g |
| Fat | 11.2 g |
| Carbs | 15.4 g |
| Fiber | 0.4 g |
| Sugar | 11.8 g |
| Sodium | 1180 mg |
